How to Fit, Support, Clean and Store a Boat Cover
Make your mooring or storage cover last for years by getting the fit right, supporting and venting it so water never pools, using a cover that's rated for the highway, cleaning and re-waterproofing it the right way, and fixing small tears before they grow.
Time
1 h 30 min
Shop would charge
$50-400
Applies to
All engines
Safety first: Water and snow sitting on a cover are very heavy. They can tear the cover, break windshields and bimini frames, overload a lift or trailer, and make a boat on stands top-heavy. Never tie a cover to jack stands: wind and snow load can pull the stands out from under the boat. Use a helper and a stable ladder, and don't walk on a covered deck.
Owners often ask
- Water keeps pooling on my boat cover. How do I stop it?
- Can I tow my boat with the mooring cover on?
This guide walks you through it. Still stuck? Ask the AI Mechanic about your engine.
Tools
- Tape measure
- Garden hose with a gentle nozzle or a low-power leaf blower (no pressure washer)
- Soft-bristle brush and buckets
- A helper and a sturdy step ladder
- Permanent marker (for labeling bow, stern and centerline)
Parts & supplies
- Cover support poles or a support system (with pads on both ends)
- Padding for sharp corners (pool noodles, old towels or foam)
- Tie-down straps for trailering, if your cover doesn't include them
- Mild soap
- Mildew cleaner approved by your fabric maker
- Fabric water-repellent re-treatment approved by your cover maker
- Cover repair tape or patch kit, or a canvas shop for restitching
Before you start
Know your cover type:
- Mooring or storage cover: sized for a boat at the dock, on a lift or parked. Discover Boating notes storage covers fit more loosely.
- Trailerable cover: snug, reinforced at wear points and built with tie-downs to survive highway speeds. Yamaha warns that a loose cover on the road can flap, damage paint and gelcoat, or tear free.
- Custom, semi-custom and universal: custom fits your exact model; semi-custom fits your hull style; universal covers fit a range of sizes and often leave baggy spots that hold water.
Fabric matters: most quality covers are solution-dyed polyester or acrylic. Good fabric is water repellent but also breathes, so moisture under the cover can escape. Read the care label; cleaners and mildew treatments differ by fabric.
Covering in the water: BoatUS notes that many owners prefer not to keep a full cover on a boat that lives in the water, because it hides problems like water building up after a bilge pump failure. If you do, check the boat often.
Steps
If you're buying, measure the boat yourself: centerline length from the tip of the bow to the farthest point you want covered, and maximum beam. BoatUS reminds owners to account for bow rails, trolling motors, consoles, windshields and swim platforms. On a cover you already own, look for baggy areas, straps that won't reach, and spots where the fabric is stretched tight over a sharp edge.
Mercury advises letting the boat dry and air out before you put the cover on, because mold and mildew thrive in damp, dark spaces. Brush leaves and dirt off the cover too, so they don't fall into the boat when you roll it on or off.
Corners of the windshield, bow rail ends, rod holders, antenna bases and cleats all wear holes through fabric. The BoatUS Foundation found that new wear points showed up as covers settled over the winter. Pad them with pool noodles, foam or old towels, and check them again after a few weeks.
Water must always have a slope to run down and off the sides. Put support poles or a support system in the low areas (usually the cockpit and the stern). Pad the top and bottom of each pole so it doesn't punch through the cover or mar the deck, and put a non-skid pad under the foot so it can't slide. The BoatUS Foundation found that the poles included with many covers weren't strong enough on their own; they added extra strapping and poles and still saw poles break under pooled water. Plan for more support than you think.
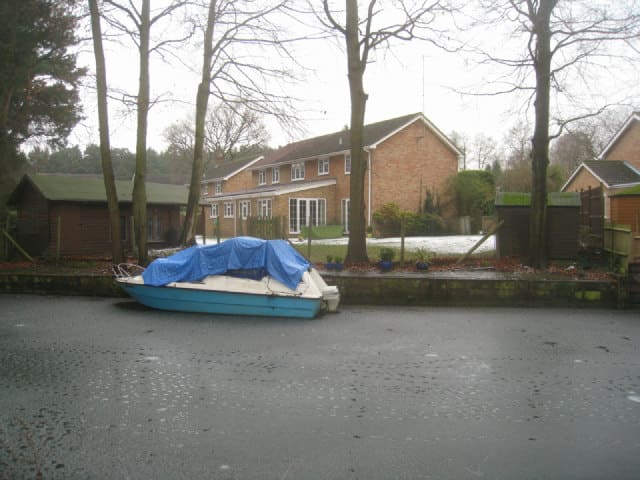
A loose tarp with no support sags and holds water. Photo: Sandy B / Wikimedia Commons · CC BY-SA 2.0 Start at the bow, roll the cover aft, and pull out wrinkles and low spots by cinching the side straps evenly. Don't overtighten one side; that pulls seams. Make sure straps are long enough to reach the trailer or a secure point. On a boat on stands, run straps under the hull to each other, never to the stands. A BoatUS editor who fought a complicated full cover for hours learned a few shortcuts: start any zipper a few inches first, then do the snaps, then finish the zip; pull an extra foot or so of slack through ratchet straps before you start; and work all the way around the edge before you go inside and set the support poles, adjusting them last for a tight, tent-like shape.
Use the cover's built-in vents and keep them open. A tight cover with no airflow traps moisture and grows mildew. If your cover has no vents, prop it so air can move under it at the ends.
Only trailer with a cover made for it, with all tie-downs fastened so no loose fabric can billow. Stop and check the straps after the first few miles. Keep loose ends tucked so they can't whip the paint or wrap around a wheel. Never trailer with a mooring or storage-only cover, or with a tarp. BoatUS notes that most trailerable cover makers want the straps buckled to the trailer frame (you can preset the buckle lengths), that every strap point along the cover should be used at highway speed, and that storage support poles shouldn't stay in while towing because they tend to work free and leave the cover loose.
The BoatUS Foundation recommends checking a covered boat at least once a month and after heavy rain or snow, and removing any pooled water or snow. During their test, most covers needed to be bailed out after storms. Gently push water off from underneath with a broom handle, never by climbing on the boat.
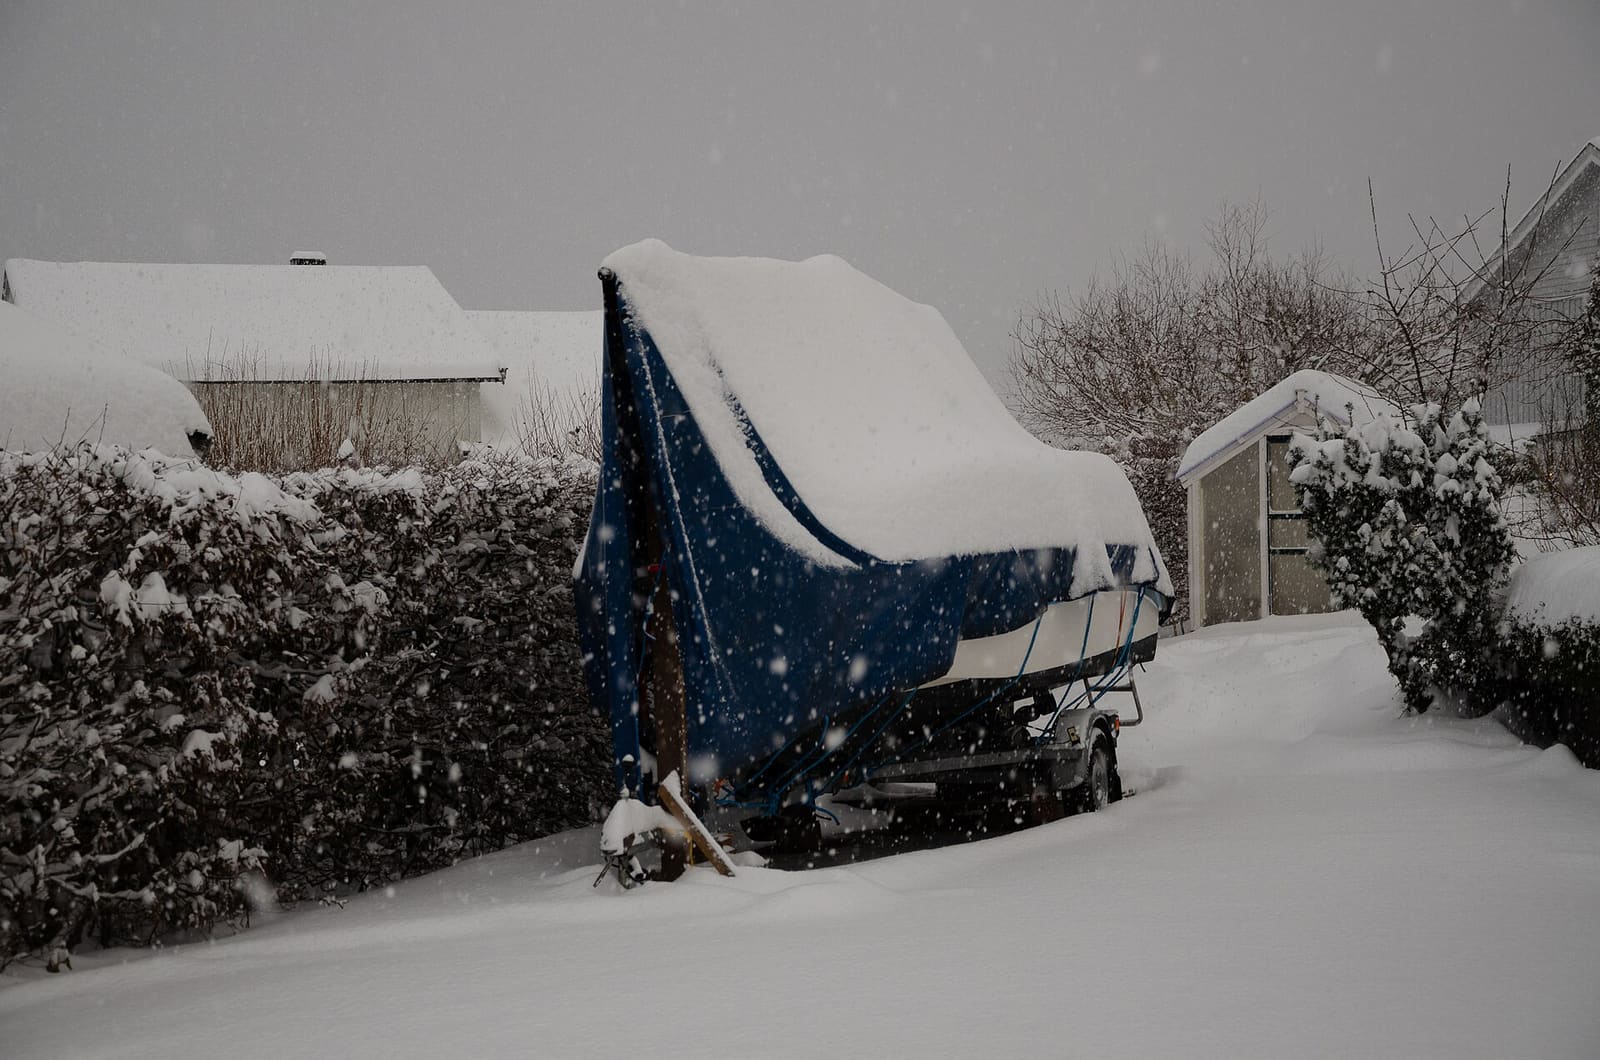
Snow load on a cover can stretch fabric, snap poles and stress the boat. Clear it after every storm. Photo: Petter Ulleland / Wikimedia Commons · CC BY-SA 4.0 Brush or blow off leaves and bird droppings, then rinse with a gentle hose. Wash with mild soap and a soft brush or sponge, and rinse well. Skip pressure washers (Yamaha warns they damage the fabric), washing machines and dryers. Some makers advise against any brush at all, so check your care label. Let the cover air-dry completely.
Mildew grows on the dirt, pollen and moisture sitting on fabric. For acrylic canvas, Sunbrella publishes a diluted bleach and mild soap recipe for mildew spots, used sparingly and rinsed very well, away from the water. Polyester and coated fabrics may need a different product, and some cover makers say not to use bleach at all. Use the cleaner your cover maker names, and test on a hidden spot first.
When water stops beading and starts soaking in, the factory water repellent has worn off (deep cleaning speeds this up). On a clean, completely dry cover, spray a re-treatment product approved by your cover maker in thin, even coats on a calm, dry day, and let it cure as the label says. BoatUS adds some specifics for acrylic canvas: skip silicone waterproofers (they don't bond evenly over the factory fluorocarbon finish), and pick a fluoropolymer-type product instead. Solvent-based re-treatments can damage clear plastic windows and plastic zippers, so cover or remove them, keep overspray off gelcoat and walkways (it makes them slippery), spot-test for color change, and spray two light coats at right angles to each other. Acrylic canvas in daily use often needs this after a few seasons; confirm with your fabric maker.
Thread usually fails before fabric. BoatUS says fraying stitching is often the first thing to go on a fitted cover. Have loose seams restitched while they're short, and patch small holes with a repair kit made for your fabric. Replace broken buckles and torn tie-down loops before they let the cover loose in wind. Snaps torn out of the fabric are a common problem on snap-on covers: iron-on patches don't stick to acrylic canvas, so the usual fix is a canvas shop sewing a reinforcing strip along the edge and setting new snaps, or new snaps placed a little away from the torn holes. To keep the rest from pulling out, lubricate stiff snaps with a snap or zipper lubricant, and fit the cover on a warm day when the fabric isn't shrunk tight; pull on the snap, not the fabric, when you unsnap it.
Never put a cover away wet. Yamaha's method: fold it lengthwise into thirds or quarters, edges toward the middle, then roll it from stern to bow. Store it in a breathable bag, off the floor, in a dry place away from rodents. Label the bow, stern and centerline with a marker so next season's install is quicker.
Common mistakes
- No support poles, or too few. Pooled water is the number one cover killer, and pooling damage usually isn't covered by warranty.
- Tying the cover to jack stands. It can pull the stands out from under the boat.
- Trailering with a mooring cover or a tarp. It flaps, scuffs the gelcoat and can tear loose on the highway.
- Covering a wet boat. You'll uncover a mildew problem in spring.
- Pressure washing or machine washing the cover. It wrecks the coating and seams.
- Ignoring a small tear. Wind turns it into a big one in a single storm.
When to call a pro
- Seams are opening along long sections, or fabric is torn near tie-down points
- Your boat needs a cover around a tower, T-top or radar arch and nothing fits off the shelf
- You keep getting pooling despite poles (a canvas shop can add a frame, ridge pole or support system)
- Your marina requires shrink wrap or a specific cover type for winter storage
- The cover is still under warranty and has failed seams or fabric (take photos showing correct installation)
Tips
- Read the warranty: most cover only defects, often require photos of correct installation, and exclude wind and pooling damage. Terms vary a lot: Taylor Made, for example, replaces a defective cover free in the first year, charges a pro-rated amount after that, and needs the cover sent back with proof of purchase. Keep your receipt with the cover bag.
- Taylor Made's support FAQ suggests compressed air for dirt that a hose won't shift. Keep the nozzle well back from the fabric and seams.
- Label the cover with your name and boat name; covered boats in a yard all look alike.
- Replacing a factory cover? Look for the cover maker's tag sewn into the original canvas. Taylor Made says its tags (and Ameritex tags) carry a part number and a manufacturing date that let it match the original pattern; without the tag you'll need to measure. Photograph the tag now while it's still readable.
- Taylor Made's care chart also warns against storing canvas in plastic (polyethylene) bags or near heat, and notes that vinyl parts shrink in the cold and are harder to fit, another reason to install covers on a mild day.
- Lubricate zippers and snaps once a year with a zipper and snap lubricant (a BoatUS writer also rubs a wax candle on them); the cover goes on much faster.
- In heavy pollen season, rinse the cover before rolling it off so the pollen doesn't end up in the boat.
- Log cover cleaning and re-treatment in BoatMend so you know when it's due again.
Official references
We read these to write this guide. Your engine's own manual always wins.
- BoatUS Foundation – Boat Covers for Winter Storage (cover test)
- BoatUS – Boat Covers
- Yamaha Boats – How to Choose the Right Boat Cover
- Discover Boating – Boat Covers – How to Choose the Best Option
- Mercury Marine – Next-Level Cleaning Tips for Boats
- Taylor Made Products – Frequently Asked Questions (cover cleaning, support, warranty)
- Sunbrella – Clean Sunbrella Marine Canvas
- BoatUS – How To Waterproof Canvas
- BoatUS – Boat Covers That Work (trailerable covers)
- BoatUS – Boat Covers (tips for putting them on, 2025)
- Taylor Made – Boat Canvas Care Tips
- Taylor Made – How to Pick the Right Boat Cover
Safety: BoatMend is for information only and does not replace a certified marine technician. You are responsible for your safety and your boat. Read the full disclaimer.
Last updated 2026-10-24
Related guides

Winter Boat Cover vs Shrink Wrap: Support, Ventilation, Safety and Spring Removal
Choose between a reusable winter cover and shrink wrap, build a support frame that sheds snow, vent it so the boat doesn't mildew, and know the fire risks before you try DIY shrink wrap. Includes spring removal and recycling.
How to Clean and Protect Boat Canvas, Bimini Tops and Vinyl Seats
Wash your bimini, covers and enclosure the right way, beat mildew without wrecking the stitching, keep vinyl seats soft and stain-free, look after zippers and snaps, and store everything so it comes out clean next spring.
How to Prevent and Remove Mold and Mildew on Your Boat
Stop the musty smell and black spots before they start. Find and fix the water source, keep air moving, control humidity safely, and clean mold off gelcoat, vinyl and cabin surfaces with products that won't damage them.
Winter Layup Master Checklist (Step-by-Step, With Links to Each Job)
One ordered checklist for putting any boat away for winter, from booking storage and treating the fuel to winterizing the engine, water systems, head and batteries, then blocking, covering and securing the boat. Each step links to the detailed BoatMend guide for that job.
Get Your Boat Ready for the Road: Pre-Trailering Checklist
Most trailering trouble starts in the driveway: an engine left without support, a loose strap, a cover that balloons at 60 mph, gear that blows out or tongue weight that makes the rig sway. Work through this checklist before every trip and do a quick walkaround at each stop.
How to Clean and Care for a Boat Windshield (Acrylic, Polycarbonate or Glass)
Clean your windshield without scratching it, tell acrylic, polycarbonate and glass apart, deal with haze, crazing and small cracks, stop frame leaks, and keep wipers and the walk-through door working.