How to Find and Fix Leaking Deck Hardware (Rebedding Cleats, Stanchions and Tracks)
Track down the cleat, stanchion base or track that is dripping into the cabin, then remove it, seal the deck core and bed it again with the right sealant so the leak stops for years instead of weeks. Catching it early protects the deck core from rot.
Time
4 h
Shop would charge
$150-600
Applies to
All engines
Safety first: Acetone and many sealant solvents are flammable: no smoking, no heat guns near open containers, and good airflow below deck. Epoxy and its hardener can cause skin allergies, so wear nitrile gloves, and wear a dust mask when mixing powdered thickeners or sanding. A stanchion, lifeline base, cleat or track that is out of the boat is a missing safety part: do not go out with it removed, and never rely on a fitting you could not tighten properly. This guide covers hardware above the waterline only. A leaking through-hull or anything below the waterline is a different job: see the seacocks guide, haul the boat or call a pro, and if the boat is taking on water call USCG on VHF 16 or 911.
Owners often ask
- Water drips into my cabin when it rains. How do I find which deck fitting is leaking?
- Should I rebed my cleats and stanchions with butyl tape, polysulfide or 5200?
This guide walks you through it. Still stuck? Ask the AI Mechanic about your engine.
Tools
- Wrenches and screwdrivers that fit the fastener heads and nuts (two sets, one for a helper below)
- Thin putty knife or plastic scraper
- Razor blades and a utility knife
- Drill with bits, a countersink bit and a bent nail or small hook bit for reaming core
- Garden hose and a flashlight
- Painter's tape (the kind that can stay on for a few days)
- Caulking gun if your sealant comes in a cartridge
- Small syringe or squeeze bottle for epoxy
- Nitrile gloves, safety glasses and a dust mask or respirator
- Clean, lint-free rags
Parts & supplies
- Bedding sealant suited to the job (butyl tape, polysulfide or polyurethane; see step 7)
- Marine epoxy resin and hardener
- Colloidal silica or another epoxy thickener
- Acetone or mineral spirits for cleaning (check the sealant maker's label)
- New stainless fasteners, washers and nylon-insert lock nuts if the old ones are worn or corroded
- Backing plates or large fender washers if the fitting had none
Before you start
Why it matters: Every fitting bolted through the deck is a hole. When the bedding under it dries out and cracks, rainwater and spray run down the bolts. If you are lucky it drips into the cabin where you see it. If not, it soaks into the deck core (often end-grain balsa or plywood between two fiberglass skins), where it causes rot and soft spots. BoatUS notes that balsa soaks up water very quickly and that freeze-thaw cycles make the damage worse every winter.
No shortcuts: Smearing new caulk around the outside of a leaking fitting almost never lasts. Both BoatUS articles are clear: the fitting has to come off, both surfaces must be cleaned to bare material, and it has to be bedded again from scratch.
Plan for access: The nuts are usually under headliners, cabinets or liners. Removing trim panels is often the slowest part. A helper below with a wrench makes the job much faster.
Weather: Pick a dry stretch of a few days with mild temperatures. Sealants and epoxy cure slowly in the cold, and you want the deck dry when you seal it.
Steps
Water travels along the underside of the deck before it drips, so the drip is often not under the leak. Dry the area inside completely. Then have a helper below with a flashlight while you run a gentle stream from a hose around one fitting at a time, starting at the lowest one and working up. Give each fitting a few minutes before moving on. Mark every fitting that shows water.
With the fitting still in place, press and tap the deck around it with the handle of a screwdriver. A dull, soft or "dead" sound, a spongy feel, or cracks radiating out from the base suggest wet or broken core. Note the size of the suspect area. A small damp ring right around the bolt holes is a DIY fix. A large soft area is not (see "When to call a pro").
Have your helper hold the nut below while you turn the bolt head from above (or the other way around if the head is hidden under a plug). Use penetrating oil on corroded threads and give it time. If a bolt spins and will not come out, stop and get help before you chew up the deck. Keep the parts in labeled bags so each fitting goes back in its own spot.
Slide a thin putty knife under the edge and work it around slowly. If the original builder used a strong adhesive sealant (polyurethane such as 3M 5200), the fitting can be bonded tight. Do not lever it off with a screwdriver: you can tear out gelcoat. BoatUS suggests a debonding solvent made for polyurethane sealants. If you use heat, keep the fiberglass cool enough to touch.
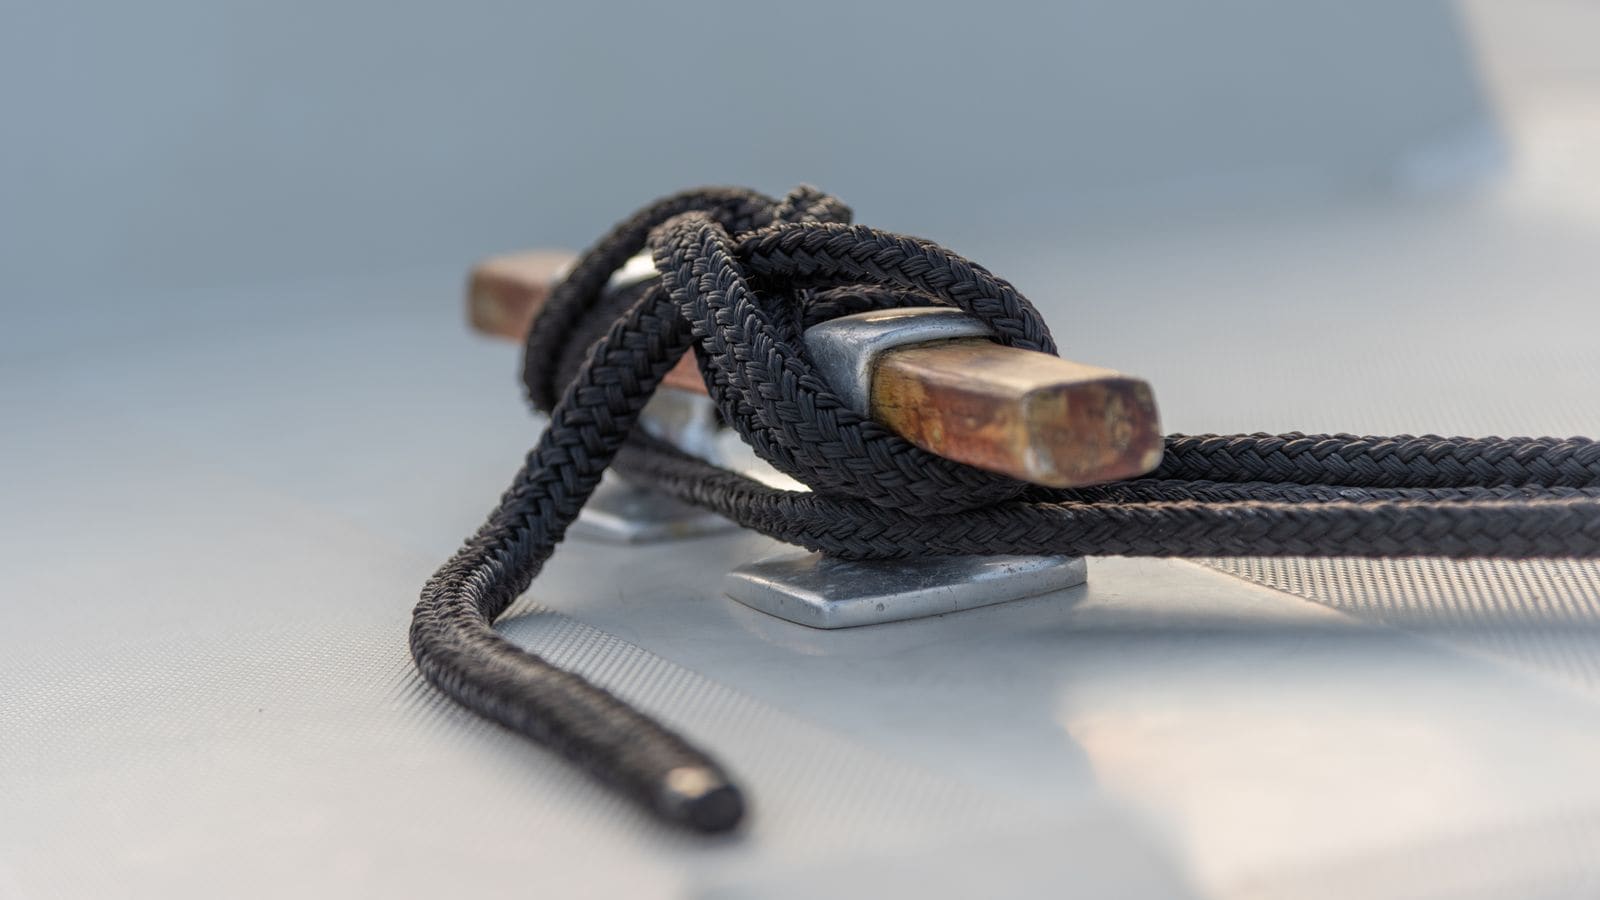
Cleats like this carry big loads, so the bolts, backing plate and bedding all matter. Photo: Gunnar Ridderström / Pexels Scrape every bit of old sealant off the deck and the underside of the fitting, including inside the bolt holes. New sealant sticks to old sealant, not to the boat, so leftovers mean a new leak. Finish with a solvent wipe, changing rags as they get dirty. Cruising World points out that brand-new hardware and bolts often carry polishing wax or oil, so wipe them too. If the old bedding was silicone, acetone will not remove the film; sand it off.
This is the step that protects the deck for good. For each bolt hole in a cored deck:
- Tape the hole closed from below.
- Ream out the core around the hole sideways with a bent nail in a drill, or drill the hole oversize through the top skin and core only. Vacuum out the debris.
- Fill the hole with mixed, unthickened epoxy, let it soak into the exposed core for a few minutes, then let the excess drain out.
- Thicken more epoxy with colloidal silica to about mayonnaise consistency and fill the hole flush.
- Let it cure fully, then drill the bolt hole back through the center of the epoxy plug.
The bolt now passes through solid epoxy instead of bare wood or balsa, so water cannot reach the core and the deck will not crush when you tighten the nuts. If the drill shavings came out wet or dark, let the area dry out first and see "When to call a pro".
- Butyl tape: Never hardens and stays flexible, easy to clean up, and the fitting can come off again later. BoatUS likes it under bolted cleats and stanchions where the bolt can be held still and tightened with a nut. It is a poor choice under screws, because a turning screw drags the tape out of place. Buy tape sold for marine use.
- Polysulfide (for example BoatLIFE Life-Calk): Stays flexible, works above and below the waterline, and the fitting can be removed later. It can attack some plastics such as polycarbonate (Lexan) and PVC, so do not use it on plastic parts.
- Polyurethane adhesive sealant (for example 3M 5200): Very strong glue. Great for joints that should never come apart, but it makes the fitting very hard to remove next time. Avoid it on hardware you may need to rebed. 3M's 4200 line is sold as a medium-strength version that still lets parts come apart later; check the label of whatever you buy.
- Hybrid UV-resistant sealant (for example 3M 4000 UV): 3M describes it as a medium-strength, color-stable sealant made for topside parts that sit in the sun, such as hardware, hatches and portlights, that can still be disassembled after years of use. A good middle ground for exposed fittings where looks matter.
- Silicone: Flexible, but it does not stick very strongly, and paint and varnish will not stick anywhere silicone has touched. Pros treat it as an above-the-waterline product at best. Do not use it for anything below the waterline, and keep it off surfaces you may paint or varnish later.
Whatever you choose, read the label for temperature limits, cure times and the cleanup solvent.
Put a small countersink (chamfer) on the top edge of each bolt hole in the deck. This leaves a little pocket that fills with sealant and works like an O-ring around the bolt, and it helps stop the gelcoat from cracking at the edge of the hole. Dry-fit the fitting, bolts, backing plate and nuts to be sure everything lines up before any sealant comes out of the tube.
Trace around the fitting on painter's tape, cut along the line with a knife and peel out the inner piece, so the squeeze-out lands on tape. Then:
- Liquid sealant: cover the whole base of the fitting, not just a ring around the edge, and put a ring of sealant under each bolt head.
- Butyl tape: lay a strip around the base and wrap a small rope of tape under each bolt head so it fills the countersink. Warm the tape a little in cold weather so it squeezes out.
Do not put sealant on the backing plate, washers or nuts underneath. If the top seal ever fails, you want the water to drip into the cabin where you will see it, not get trapped around the bolt in the core.
Tighten evenly in a criss-cross pattern until you see a continuous bead of squeeze-out all the way around. Turn the nuts below, not the bolt heads, so you do not twist the sealant around the bolt.
- With polysulfide or polyurethane, many experts (including Don Casey for BoatUS) snug the bolts only, let the sealant firm up, then do the final tightening the next day so the cured sealant stays under compression. Others tighten fully right away. Follow the sealant maker's instructions.
- With butyl tape, tighten gradually and come back over a day or two to take up more as the tape flows.
Do not crank down so hard that the backing plate dents the deck or the fitting bends. Check your boat or hardware maker for the exact torque.
When the sealant is firm, run a fresh razor blade around the base and peel off the tape. Leave a thin, neat edge rather than a big fillet; thick exposed beads collect dirt and weather faster. For butyl, roll the extra squeeze-out up with your fingers or a plastic scraper.
After the full cure time on the label, repeat the hose test from step 1. Then put the headliner back. Log the date, the sealant used and photos in BoatMend so you know what is under each fitting next time.
Common mistakes
- Caulking over the outside of a leaking fitting. It hides the leak while water keeps feeding the core.
- Bedding over old sealant. The new bead sticks to the old one and fails along the same line.
- Drilling through a cored deck with no epoxy seal. The core around the hole is bare wood waiting for water.
- Sealing the nuts and backing plate below. That traps water inside the deck instead of letting it show in the cabin.
- Using 5200 on a fitting you will need to remove. Next time the fitting, the gelcoat or both may be damaged getting it off.
- Silicone under a fitting on a deck you plan to paint, or below the waterline. Paint will not stick near it, and it is not the right product for underwater joints.
- Squeezing all the sealant out on the first turn. A dry joint leaks; leave a film and tighten in stages.
- Rebedding a stanchion that is cracked or bent. If the base is cracked or the deck flexes when you push the stanchion, fix the hardware and support first.
When to call a pro
- The deck is soft, spongy or delaminated over an area bigger than the fitting's footprint
- Drill shavings come out wet, black or rotten, or the core is gone around the holes
- Cracks run out from a cleat, chainplate, stanchion or winch base, or the deck flexes under load
- Chainplates, mast steps, windlasses, pulpits or other high-load rigging attachments are leaking (see the rigging guide)
- You cannot reach the nuts without removing major interior parts, or a bolt spins and will not come out
- Anything at or below the waterline, or near fuel fills and vents
Tips
- Do one or two fittings at a time so the boat is never missing all its cleats or lifeline support.
- Write the sealant type on a piece of tape inside the locker under each fitting.
- Small stains on the headliner, rust streaks on the bolts or a musty smell in a locker are early warning signs. Rebed early, before the core gets wet.
- A cleat with screws instead of through-bolts and a backing plate is a good candidate for an upgrade while it is off. See the mounting accessories guide.
Official references
We read these to write this guide. Your engine's own manual always wins.
Safety: BoatMend is for information only and does not replace a certified marine technician. You are responsible for your safety and your boat. Read the full disclaimer.
Last updated 2026-10-24
Related guides

How to Repair Small Gelcoat Chips and Scratches
Fill and blend small chips, dings and scratches in your boat's gelcoat with a repair kit so they stop letting water into the fiberglass and look close to new. Also learn to spot damage that is structural and needs a pro.

How to Check a Boat for Transom and Stringer Rot
Many older fiberglass boats have wood inside the transom, stringers and deck, and water that gets in slowly rots it. Learn the tap test, the flex test, how to read a moisture meter and the other warning signs, and why a rotten transom or stringer is a structural job for a pro, not a weekend patch.
How to Mount Rod Holders, Fish Finders, Cleats and Antennas Without Causing Leaks
Add accessories to your boat the right way, with through-bolts, backing plates, sealed core and proper wire pass-throughs, so every new hole stays dry and strong. Also learn where you should never drill.

How to Fix Leaking Hatches and Portlights
Find out whether a leaking deck hatch or portlight is failing at the gasket, the lens or the frame, then fix it with the right seal or sealant. Learn when crazed or cracked acrylic needs a new lens and what never to put on plastic windows.

How to Inspect Your Sailboat's Standing Rigging
A step-by-step owner's inspection of the wires, fittings, turnbuckles, pins, chainplates and mast that hold your rig up, plus how to decide when it is time for a rigger and new rigging. Includes what insurers commonly expect for older rigs.

How to Inspect Wakeboard Tower, T-Top and Bimini Hardware
Towers, T-tops and biminis carry tow ropes, speakers, boards, electronics and wind loads, all on a handful of bolts. Learn how to check the welds, bases, backing plates, bolts, folding hinges and accessory loads before a crack or a loose bolt becomes an accident.

How to Inspect a Used Boat Before You Buy
A step-by-step checklist for looking over a used boat, from paperwork and the hull ID number to the transom, engine, compression test, sea trial and trailer. Know what to check yourself, what the red flags mean, and when to pay a marine surveyor.