Galvanic Isolator: Why Shore-Powered Boats Need One and How to Tell If It's Working
A galvanic isolator (or an isolation transformer on bigger boats) keeps stray DC current from the marina's ground wire from eating your anodes, drive and running gear, without cutting the safety ground. Learn what it does, the owner-level checks you can do, what failure looks like, and why the actual meter test is usually a job for a marine electrician.
Time
30 min
Shop would charge
$150-600
Applies to
All engines
Safety first: The galvanic isolator sits in the green safety ground wire of your shore power system. That wire is what makes a fault trip a breaker instead of energizing the boat and the water around it. Never cut, bypass or disconnect the green ground wire to stop anode loss: BoatUS calls this a potentially deadly mistake, and it can put swimmers at risk of Electric Shock Drowning. This guide is for looking and logging only. Opening the AC panel, the inlet or the isolator, and doing the meter test, belongs to an ABYC-certified marine electrician. If you see a burned, melted or hot isolator, unplug from shore power (pedestal breaker off first) and call a pro.
Owners often ask
- My anodes disappear fast when the boat is plugged in at the marina. Why?
- Can I just disconnect the green ground wire to stop corrosion?
This guide walks you through it. Still stuck? Ask the AI Mechanic about your engine.
Tools
- Flashlight
- Phone camera for photos of the unit and its labels
- Notebook or BoatMend log for anode condition
Parts & supplies
- None for the owner checks
- If replacement is needed, a fail-safe galvanic isolator rated for your shore power service (30 or 50 amps), installed by a pro
Before you start
Why boats on shore power lose anodes fast: any boat with different metals in the water (bronze prop, stainless shaft, aluminum drive or hull) forms a small battery. Your sacrificial anodes are there to give up metal so the important parts don't. When you plug into shore power, the green ground wire connects your boat's underwater metals to the dock wiring and to every other boat plugged in. BoatUS explains that a poorly protected boat next door can then drain your anodes, and an unprotected aluminum sterndrive can end up acting as a giant anode for your neighbor's bronze prop.
What the isolator does: it is a block of diodes (usually with a capacitor) placed in the green ground wire, between the shore power inlet and the boat's ground bus. It blocks the small DC voltages that drive galvanic corrosion (BoatUS says about 1.2 volts; Victron says about 1.4 volts, and both note this is above typical galvanic voltages) but lets a real AC fault current pass so the breaker or ground-fault device can still trip.
Isolation transformer: larger boats may have an isolation transformer instead. It breaks the connection to the shore ground completely and creates a new, local power source on board. Victron calls it the better solution; BoatUS notes it is heavy and expensive, which is why most smaller boats use an isolator. In a 2015 article BoatUS put a typical 30-amp unit at roughly 60 to 70 pounds, mounted close to the shore power inlet, with prices starting around $600 plus installation; it also corrects reversed shore polarity. A related type, the polarity transformer, keeps the green shore ground and so still needs a galvanic isolator.
Who needs one: if your boat plugs into shore power, it very likely does. Ed Sherman, former education director of ABYC, writes in BoatUS that apart from missing anodes, shore power is probably the most common cause of severe underwater metal corrosion, and that any boat plugged in regularly needs an isolator or an isolation transformer. Mercury recommends a galvanic isolator for boats on shore power to protect the drive from stray-current corrosion from the dock or nearby boats, and notes that this kind of corrosion is not covered by its warranty.
Fail-safe types: BoatUS recommends a unit with a UL marine rating certified as fail-safe, meaning that if the diodes fail, the ground connection stays intact. Boating Magazine notes that older isolators could fail "open," dangerously disconnecting the boat's ground, while units installed on new boats since about 2011 fail "closed" for safety, which keeps people safe but leaves the boat unprotected from corrosion until the unit is replaced.
Steps
Look in your owner's manual, on the AC panel and near the shore power inlet for a galvanic isolator, an isolation transformer, or neither. Isolators are often a finned metal box, usually mounted near the inlet or the main AC panel. Photograph the label: brand, amp rating, and any "fail-safe" or UL marking. If you can't find one, ask your marine electrician or surveyor.
The isolator's amp rating should match your shore power system (BoatUS notes it is typically 30 or 50 amps). A boat with two 30-amp inlets needs an appropriately sized isolator for each. If the label shows a smaller rating than your inlet or you can't read it, have a pro check it.
With shore power unplugged, look at the outside of the isolator and its wires. Warning signs:
- Discoloration, melted plastic, or a burned smell
- Heavy corrosion on the case or terminals
- Loose, cracked or bent mounting
- Wires held by tape, spring clips or friction connectors (BoatUS says the unit must be hard-wired)
- Signs of water dripping on it
BoatUS recommends checking the unit and its connections for corrosion or damage at least once a year. Anything on the list above is a call-a-pro item.
Many isolators, especially non-fail-safe ones mounted out of sight, have a remote monitor panel. BoatUS says to check it whenever you plug into shore power and after any major electrical event such as a nearby lightning strike. A fault light means the isolator may no longer be protecting your boat; book an electrician. Keep in mind Practical Sailor's caution that a green "all good" light on plug-in testers is not proof of a sound ground: a system with an open ground wire can show the same indication.
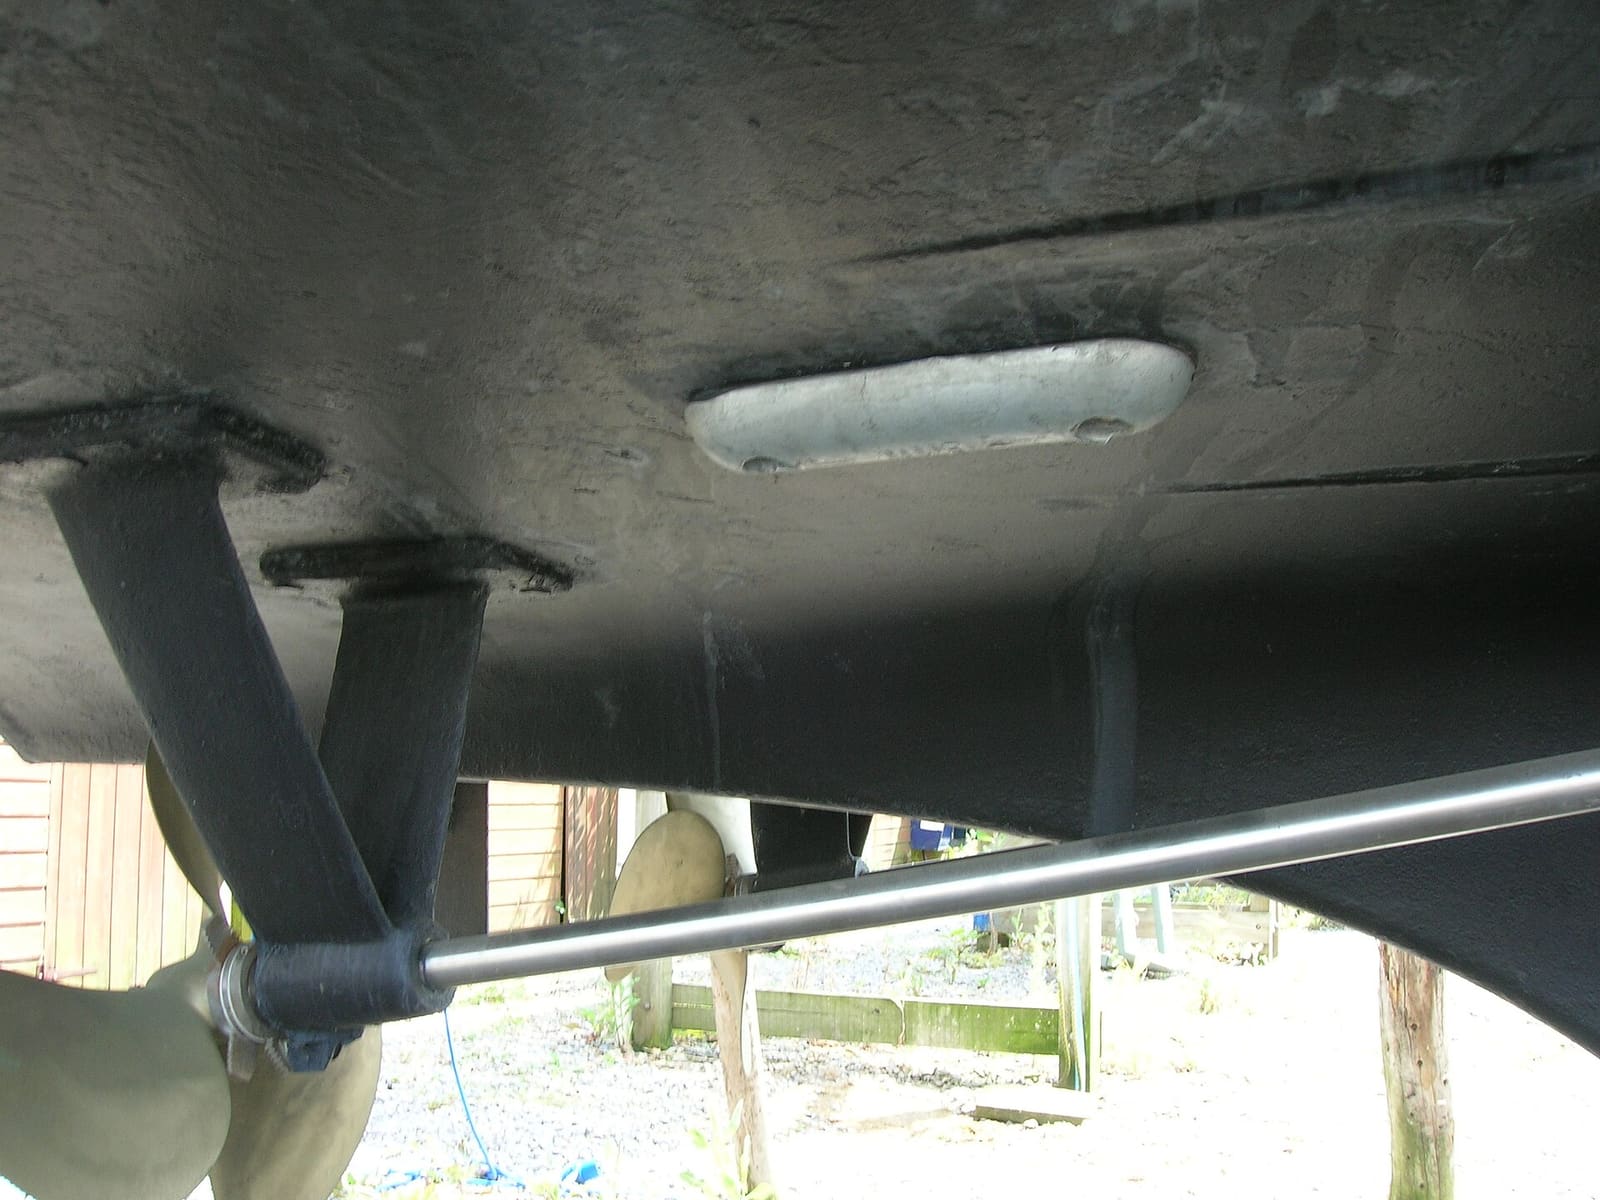
Inspect the anodes on your drive, shaft, trim tabs or hull (see sacrificial anodes) and log their condition with a photo each time. Anodes that disappear much faster than before, especially after you moved to a new slip or started leaving the boat plugged in, are a classic sign that the isolator has failed or that your boat is picking up stray current. Anodes that stay shiny and unworn in salt water can mean the opposite problem: they are not connected or are the wrong alloy.
A few anode rules that make your log meaningful:
- Replace at about half gone. Mercury and Yamaha both say to replace anodes when roughly 50% is consumed; BoatUS adds that a crumbling anode may no longer protect at all.
- Snug, bare and clean. A slightly loose anode doesn't work, and anodes must never be painted. In fresh water, Yamaha suggests scrubbing off the thin film of growth that can stop them working.
- Right alloy, not mixed. BoatUS warns that magnesium is for fresh water only, and that mixing alloys on one boat lets one anode protect the other instead of your drive. Low-quality anodes may not have the right alloy at all (Mercury).
- Warm water speeds it up. Mercury notes water conductivity rises with temperature, which is one reason boats in Florida corrode faster than boats in Maine. A slip move south can change your numbers.
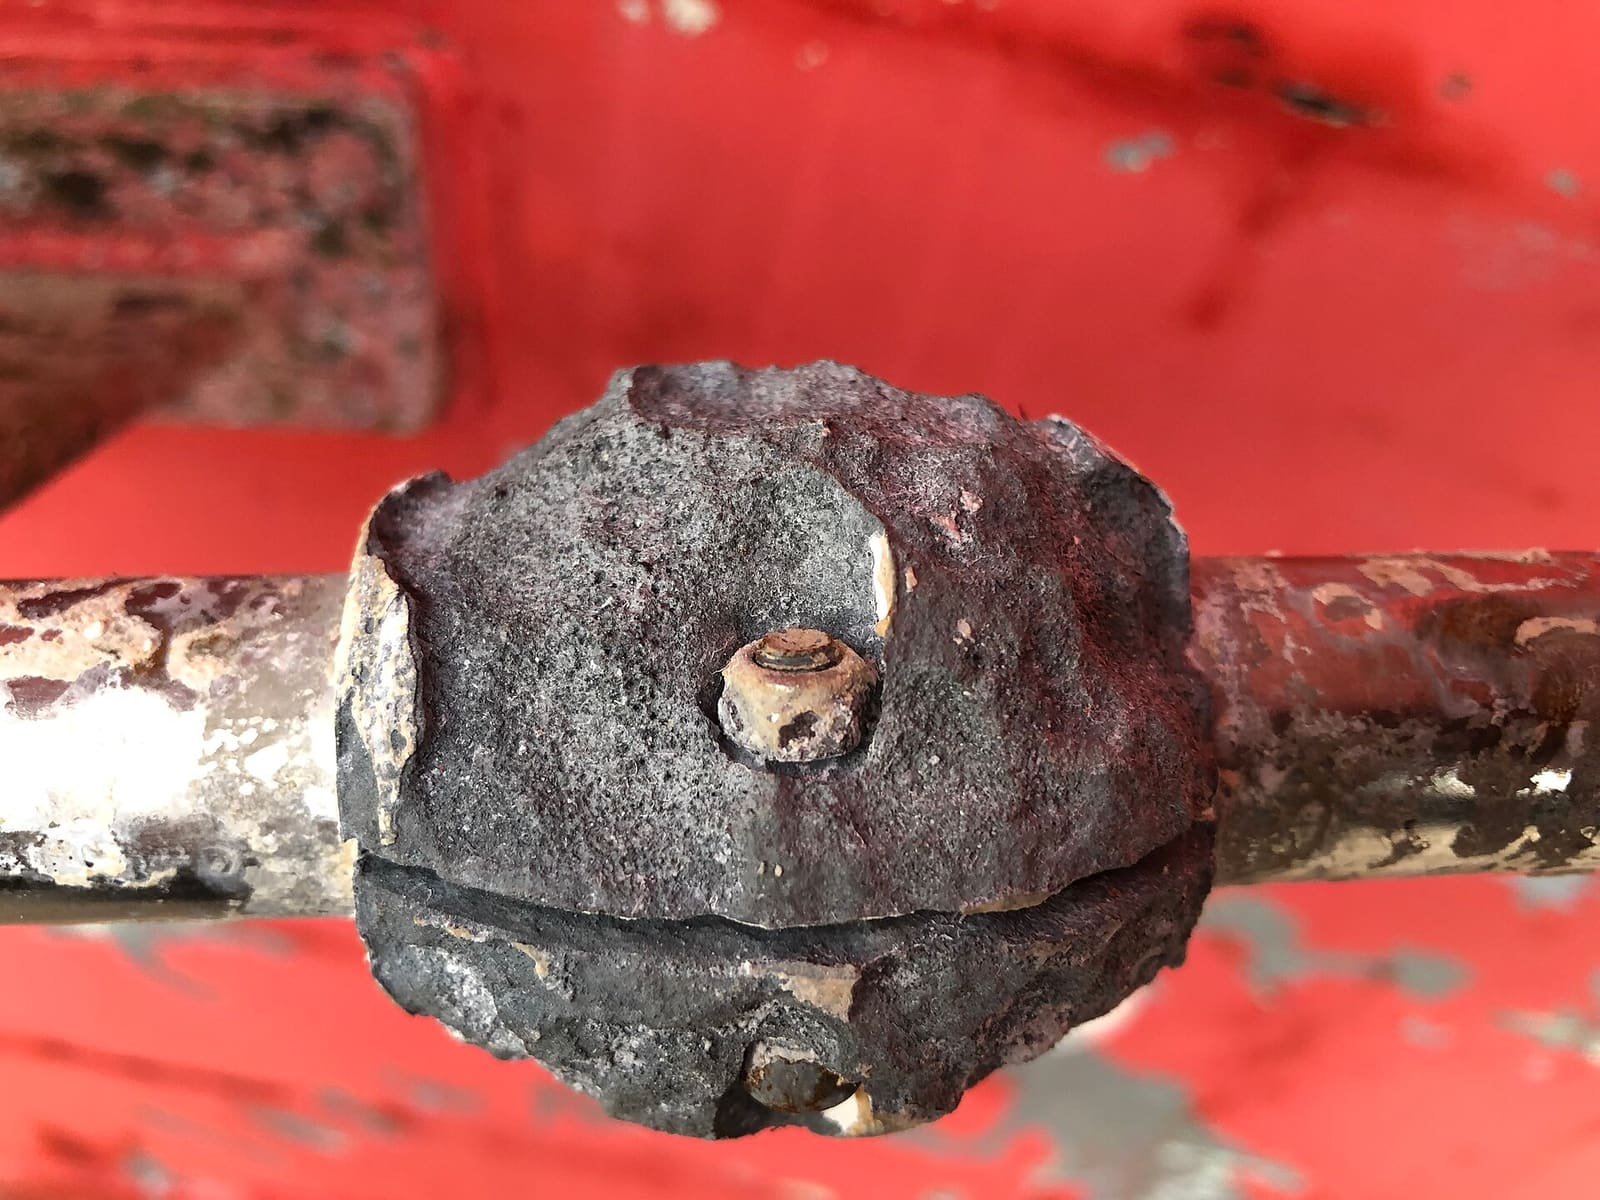
Photo: Springnuts / Wikimedia Commons · CC BY-SA 4.0 Mercury describes one of the first signs of galvanic corrosion on a sterndrive as paint blistering below the waterline, starting on sharp edges, with white powder forming on the exposed aluminum; left alone, the metal becomes deeply pitted. Mercury also notes that adding stainless steel parts (props, trim tabs wired to engine ground, aftermarket steering) speeds up corrosion of underwater aluminum. Photograph and log anything like this. See sterndrive corrosion and MerCathode and aluminum hull corrosion.
Boating Magazine quotes a retired Blue Sea Systems engineer: a lightning strike, even nearby in the marina rather than on your boat, can pass enough current to make the isolator's diodes fail. Get the isolator tested after:
- Any lightning strike on or near your boat
- A major electrical fault, burned shore power plug or tripped main breaker you can't explain
- Sudden, fast anode loss
- Buying a used boat (ask the surveyor)
The common bench check uses a multimeter's diode-test function. With dock and boat breakers off and the cord unplugged at the dock end, the technician connects the meter between the shore cord's ground pin and the boat's green ground bus. Boating Magazine describes a healthy unit as showing a reading that slowly climbs to roughly 1 volt and stops, then the same result with the leads reversed after briefly shorting the two grounds to discharge the internal capacitor. Because this requires reaching the ground bus behind the AC panel, and a mistake can leave the boat ungrounded, we recommend letting an ABYC-certified marine electrician do it. Ask for an in-water hull potential test at the same visit: Mercury recommends having a dealer do one where the boat is normally kept, to confirm your corrosion protection level is adequate.
Sherman also warns that early isolators had built-in shortcomings that can make them unsafe, and that you can't tell whether one works without testing it properly. If your shore-powered boat has no isolator, or an old non-fail-safe unit without a monitor, ask your electrician about a UL-listed fail-safe galvanic isolator, or an isolation transformer for a larger boat or a "hot" marina. BoatUS puts a typical isolator at around $200 for the part; installation is a ground-wire job and should be done by a pro. Also ask whether your boat has an ELCI (whole-boat ground-fault protection); the ESDPA recommends isolation transformers or ELCI protection on boats with AC systems. BoatUS notes ABYC has required ELCIs on new boats since roughly 2012, and that adding one to an older boat (usually combined with the main shore power breaker) runs about $200 plus an hour or two of a certified marine electrician's time.
Log the isolator type and rating, the date of each visual check, monitor readings, anode photos and replacement dates, and any professional test results. A pattern of fast anode loss after a slip change is useful information for your electrician and your marina.
Common mistakes
- Cutting the green ground wire to "fix" anode loss. It can stop the corrosion and create a shock and drowning hazard.
- Assuming the isolator is fine because there is no fault light. Fail-safe units can fail closed silently, leaving the boat unprotected.
- Replacing anodes over and over without asking why they disappear so fast.
- Installing a cheap isolator rated below the boat's shore power service.
- Using friction or spring-clip connections on the ground wire during a DIY install.
- Leaving the boat plugged in all season "for the charger" without an isolator on a boat with an aluminum drive.
When to call a pro
- Any fault light, burned, corroded or damaged isolator
- Fast or uneven anode loss, or new pitting on drives, props or the hull
- After a lightning strike on or near the boat
- Installing, replacing or testing an isolator or isolation transformer (ABYC-certified marine electrician)
- Tingling felt in the water near your boat or dock: unplug, keep everyone out of the water, and call a pro and the marina right away (see shore power safety)
Tips
- Take a photo of each anode every time you haul out or dive the boat. Side-by-side photos make "faster than normal" obvious.
- If you change marinas or slips, check the anodes a few weeks later. A neighbor's faulty boat can change your corrosion picture.
- Unplug from shore power when you don't need it, especially if you're unsure about the isolator; it is the cheapest way to stop shore-ground corrosion.
- Ask your marina whether its docks have ground-fault protection and are inspected; it protects both your boat and swimmers.
Official references
We read these to write this guide. Your engine's own manual always wins.
- BoatUS – Install A Galvanic Isolator
- BoatUS – Galvanic Isolators Explained (Ed Sherman, 2019)
- Boating Magazine – Testing a Galvanic Isolator
- Victron Energy – Wiring Unlimited, Galvanic corrosion
- Practical Sailor – Shorepower Cop
- Mercury Marine – Owners Resources FAQs (galvanic isolator, stray current corrosion)
- Electric Shock Drowning Prevention Association – Preventing ESD
- BoatUS – Isolation Transformers (2015)
- BoatUS – The Current Scoop On Galvanic Corrosion
- BoatUS – The Electrical Dilemma On The Dock (ELCI retrofit)
- Mercury Marine – MerCathode, Actively Fighting Galvanic Corrosion (Dockline)
- Yamaha Outboards – Maintenance Matters, Corrosion Prevention (anodes)
Safety: BoatMend is for information only and does not replace a certified marine technician. You are responsible for your safety and your boat. Read the full disclaimer.
Last updated 2026-10-25
Related guides
Shore Power Safety: Cords, Inlets, Burned Plugs and Electric Shock Drowning
An owner's inspection routine for your shore power cord, plugs, boat inlet, galvanic isolator and ground-fault protection, plus the right way to plug in and the facts about Electric Shock Drowning. This guide is for looking and testing only; any electrical repair belongs to an ABYC-certified marine electrician.
Boat Bonding System Explained: How to Inspect Bonding Wires, Through-Hulls and Anodes
Understand what the green bonding wires on your boat do, how they tie through-hulls, running gear, tanks and engines to your anodes and DC negative, how to inspect and test the connections yourself, and which corrosion warning signs mean it's time for an ABYC-certified technician.
How to Inspect and Replace Sacrificial Anodes (Zincs)
Check the anodes on your outboard, sterndrive or inboard running gear, replace them when they are half gone, and choose the right metal for the water you boat in. Fresh anodes are cheap insurance against expensive corrosion damage to your lower unit, drive and prop.
Sterndrive Corrosion: Paint Blisters, Anodes, MerCathode and Galvanic Isolators
Learn to spot the early signs of corrosion on an aluminum sterndrive, check the anodes and the MerCathode or Volvo Penta ACP system, and understand when a galvanic isolator or a hull potential test is needed. Caught early, corrosion costs a few anodes; caught late, it can cost the whole drive.
How to Spot and Prevent Corrosion on an Aluminum Boat
Aluminum hulls and pontoon tubes are tough, but they lose almost every fight with other metals. Learn the warning signs of galvanic and stray current corrosion, keep copper and loose metal away from the hull, choose the right anodes, touch up paint with the proper primer and know when a repair needs a welder.
Lightning and Your Boat: Protection, Storm Safety and After-Strike Inspection
How lightning damages boats, what a professionally installed protection system (ABYC and NFPA 780 guidance) can and cannot do, what to do when a storm catches you on the water, and a step-by-step inspection checklist after a strike, including the haul-out, compass, electronics, through-hulls and the insurance claim.
Boat Inverters and Inverter/Chargers: Sizing, Safe Use and What a Pro Must Install
An inverter turns battery power into 120-volt household current, which makes it as dangerous as shore power and a serious fire risk if it is fused or wired wrong. Learn how to size one realistically, what a safe installation looks like, the owner checks to do, and the mistakes (like backfeeding) that hurt people.