Jet Outboard Impeller Shimming and Sharpening: Win Back Lost Thrust
Gravel and sand slowly round off a jet impeller's edges and open the gap to its liner, and the boat loses push. Learn the signs, how to make the motor completely safe to work on, how moving thin shims closes the gap, and how a light touch-up on dull blade edges can restore performance.
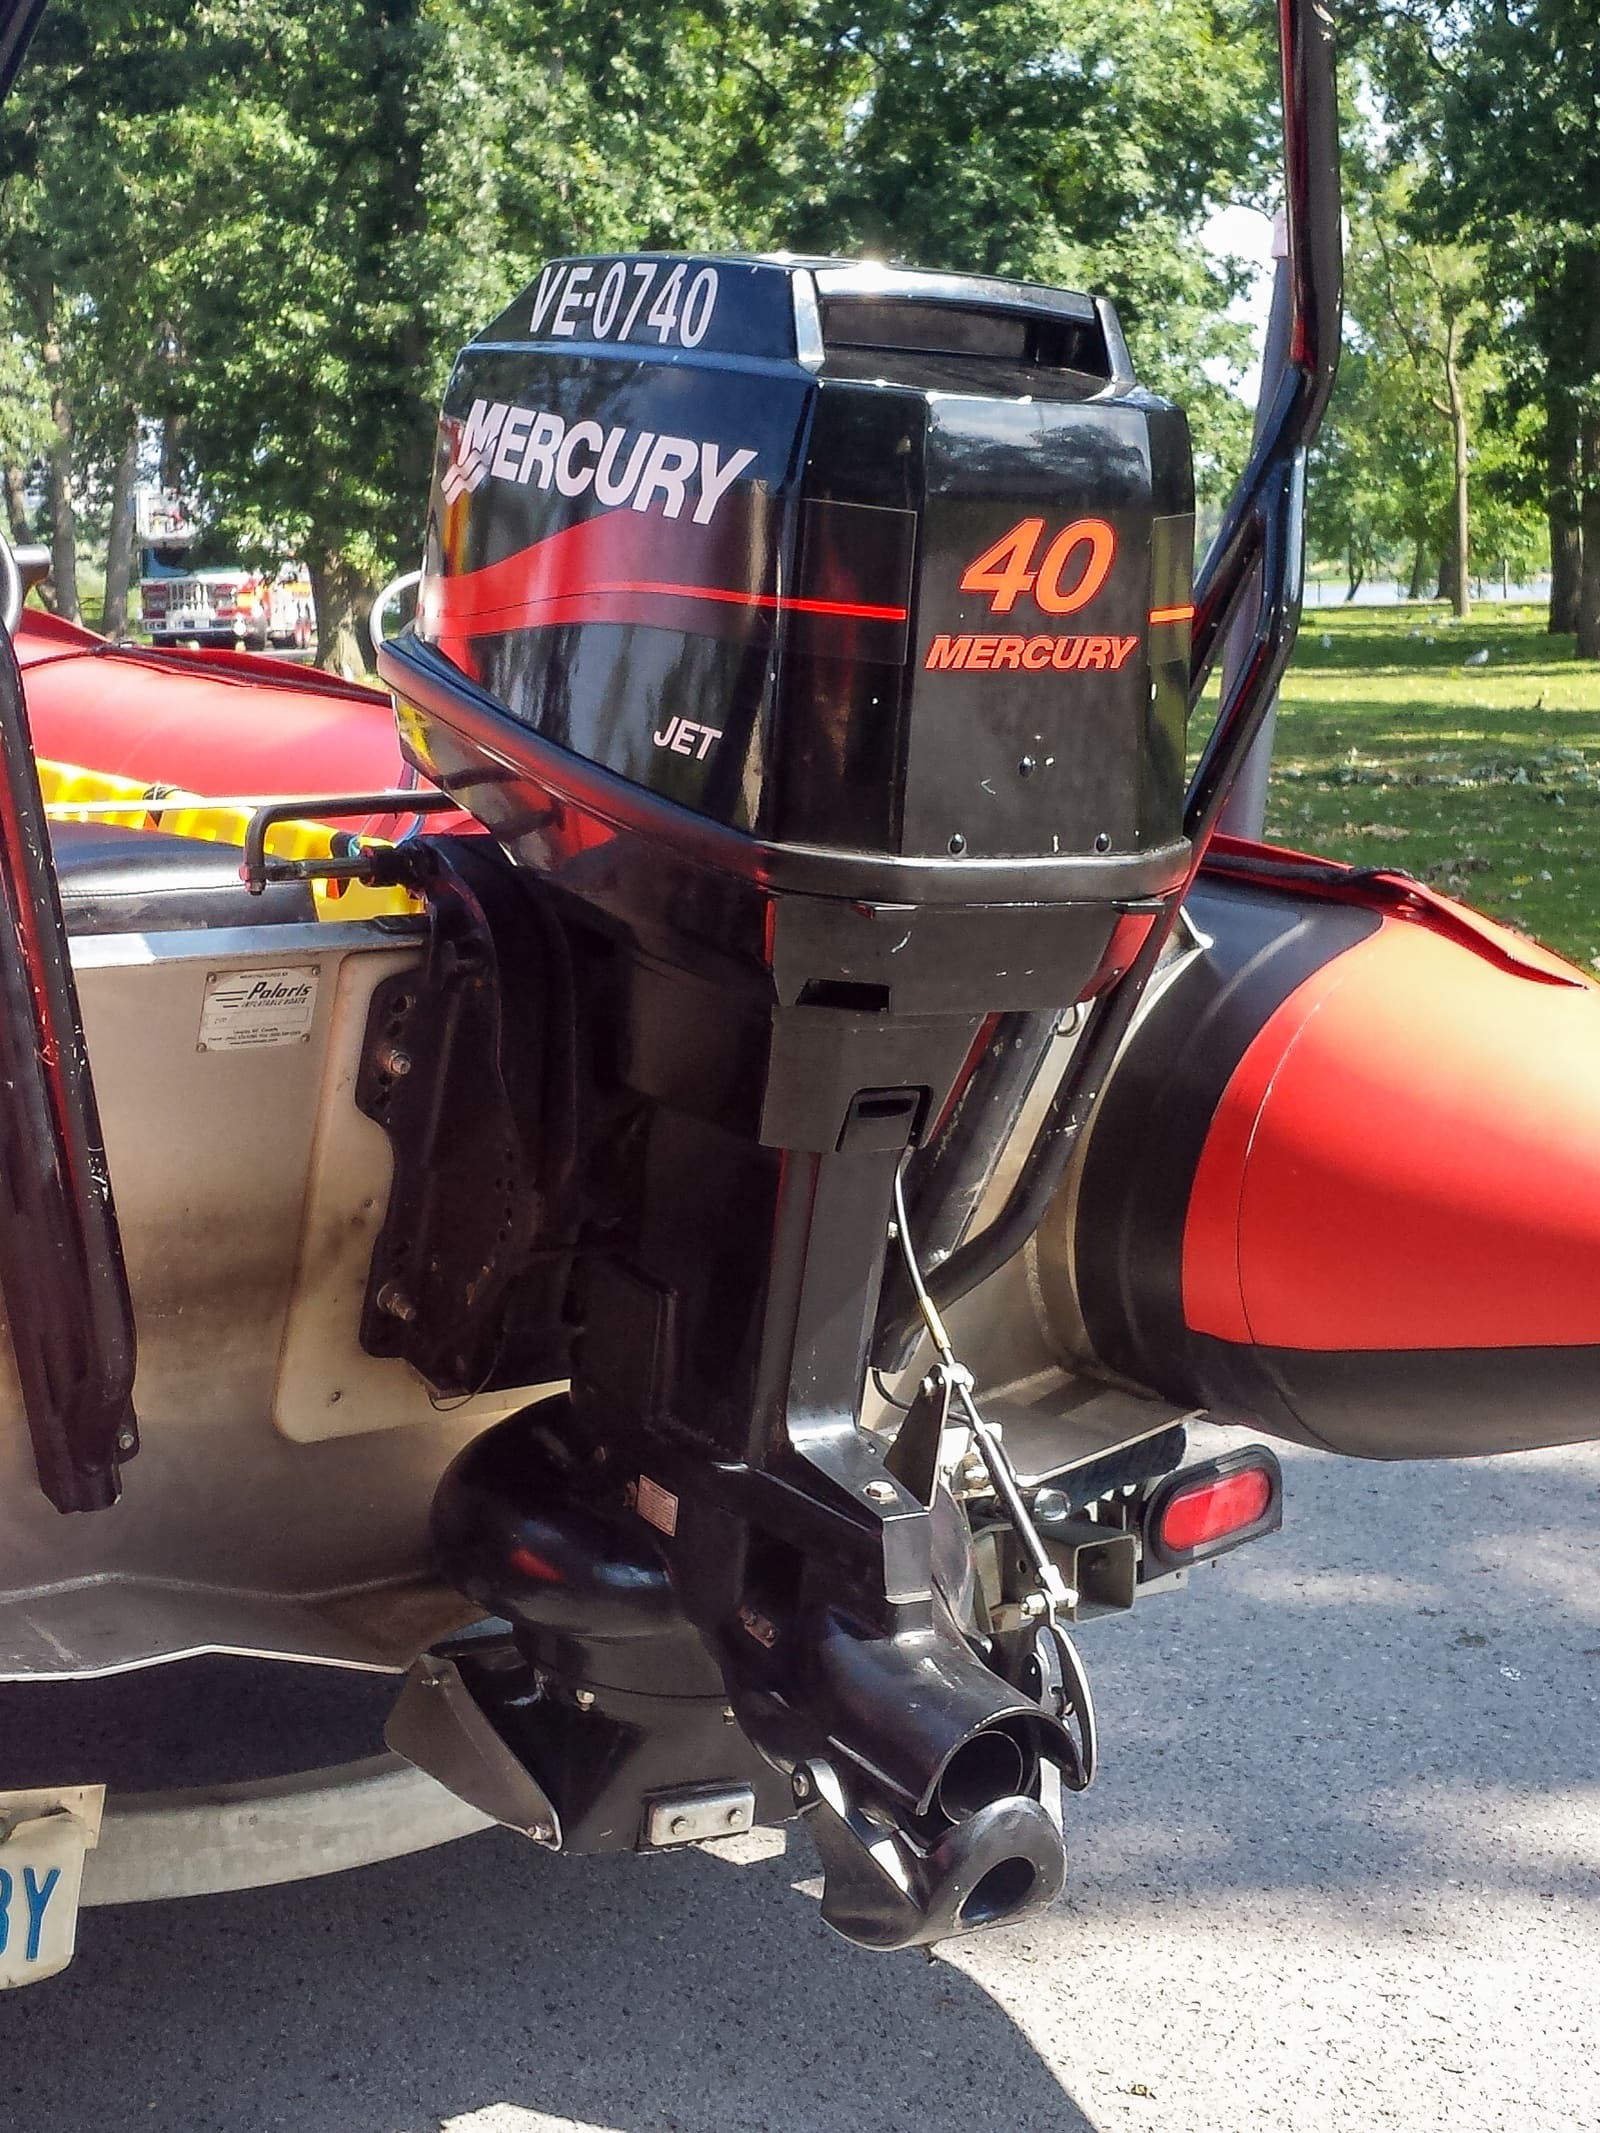
Time
2 h
Shop would charge
$150-500
Applies to
Outboard, Jet boat · Fishing boat, Jet boat
Safety first: You will be working with your hands near the impeller, and you will turn it by hand. The motor must not be able to start. Before you touch anything: shift to neutral, turn the key off and take it out of the switch, pull the kill-switch lanyard, and disconnect the battery (negative cable first). Many jet manuals also tell you to pull the spark plug wires. Support the raised motor with its tilt support lever or a solid block; never work under a motor held up only by the trim. Impeller edges are sharp, and a freshly filed one is sharper: wear cut-resistant gloves.
Owners often ask
- How do I move the shims on my jet impeller, and can I sharpen the blades myself?
- Is it safe to sharpen my jet outboard impeller with a file?
- Why is the gap between my jet impeller and the liner tight on one side and loose on the other?
This guide walks you through it. Still stuck? Ask the AI Mechanic about your engine.
Tools
- Socket set and wrenches for the intake grate or intake housing bolts
- Long-blade feeler gauge set
- Flat mill file (only if your service manual covers sharpening)
- Needle-nose pliers and a small flat screwdriver for the nut retainer tabs or cotter pin
- Torque wrench
- Cut-resistant gloves and safety glasses
- Flashlight, clean rags and a muffin tin or labeled cups for small parts
- Wooden block or the motor's tilt support lever to hold the motor up
Parts & supplies
- New impeller nut retainer, tab washer or cotter pin (your manual will say if these are one-use)
- Spare shim washers made for your jet pump, if any are damaged
- Grease for the pump bearing and anti-seize for the grate bolts, as your manual specifies
Before you start
How the gap works. A jet outboard's impeller spins inside a tapered liner (also called a wear ring). It pushes water best when the gap between its blade tips and the liner is very small. Thin washers called shims sit on the driveshaft, some under the impeller and some on top of it, under the retaining nut. Because the liner is tapered, moving the impeller deeper into it makes the gap smaller. You do that by moving shims from one side of the impeller to the other. You don't add or remove shims overall; you just change where they sit.
Why the gap grows. Every time the pump swallows sand or gravel, a little metal comes off the blade tips and the liner. Outlaw Eagle, a river jet boat builder, lists checking the impeller for cracks, chips and bends, and checking the wear ring for gouges and clearance to the impeller, among the key jet pump jobs. Mercury fits stainless impellers to its jets partly because they stand up better to abrasive debris, but even stainless wears.
Get your manual first. The target gap, which way the shims move on your pump, the nut torque, whether the retainer is reusable and whether the maker allows sharpening at all are in the jet section of your service manual. This guide explains the job; the manual gives every number. Don't use a figure from a forum or another brand.
Steps
Worn impellers and big gaps usually show up as:
- Rpm normal or higher than usual, but the boat is slower than it used to be.
- A slow, mushy hole shot, or trouble planing with your normal load.
- The motor "revs up and slips" when you punch the throttle from a standstill, then hooks up.
- Cavitation-like surging, especially when loaded.
Compare with your logged baseline of wide-open rpm and GPS speed with a typical load. A slow drop over a season of gravel running points to wear. A sudden drop after one trip points to debris or damage.
Before you take anything apart, check the things in the jet outboard care guide:
- Weeds, bark, line or a rock caught on the grate or in the impeller.
- A bent grate bar or damage to the hull bottom ahead of the intake.
- A reverse gate that isn't locking fully in forward.
- A heavier load than usual, or a dirty, waterlogged boat.
- High elevation, which reduces engine power.
If the tach shows the engine itself is down on rpm at full throttle, the problem is more likely the engine (see the loss of power guide), not the pump.
Follow the safety box above every time, even for "just a quick look": neutral, key out, lanyard pulled, battery disconnected, plug wires off if your manual says so. Tilt the motor up and lock or block it. Put a tag on the key switch or helm so nobody tries to start it while you work.
Depending on your pump, you may be able to look and measure through the grate, or you may need to remove the intake grate or the whole intake housing. Follow the manual's order for loosening bolts. Put each bolt in a labeled cup. Clean the threads and note any that are seized or corroded so you can replace them.
With a flashlight, look at:
- Blade leading edges: the edges that bite into the incoming water. Sharp and even is good. Rounded, nicked or rolled edges mean wear.
- Chips, cracks or bent blades: these are a replacement, not a touch-up.
- The liner: light scratches and gravel marks are normal. Deep gouges, or wear that is heavier on one side, are worth showing to a pro.
- Cavitation burns: frosty, pitted patches on the blades. They often go with dull leading edges or running the motor trimmed out too far.
Slide a long feeler gauge between a blade tip and the liner. Find the thickest blade that slides through with a light drag. Turn the impeller slowly by hand (the motor must be disabled) and check every blade, at a few spots around the liner. Write down the largest and smallest readings.
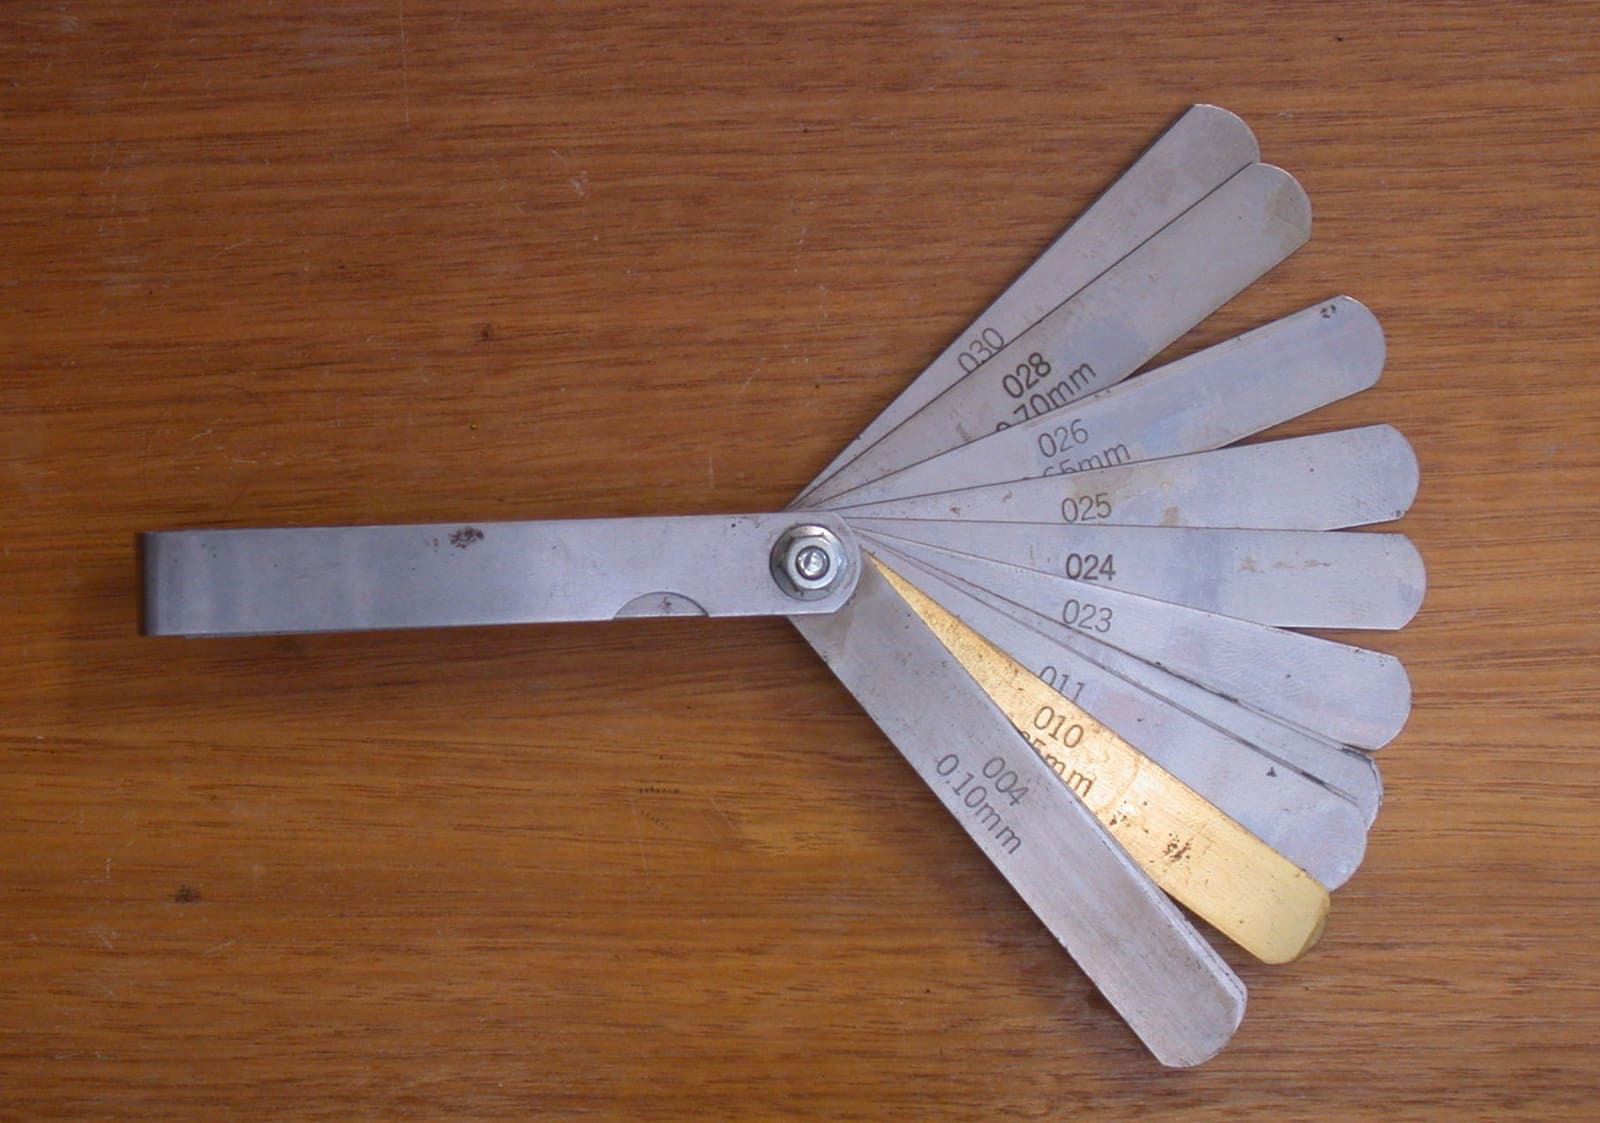
Feeler gauges measure small gaps; a jet pump needs long blades to reach the impeller tips. Photo: Graibeard / Wikimedia Commons · CC BY-SA 2.0 Compare your readings with the range in your service manual:
- Within range: the gap is not your problem. Leave the shims alone.
- Larger than the range: move shims (step 8).
- Very uneven around the liner: the liner or intake may be off center, or the impeller is running off center. SBT, a personal watercraft pump parts supplier, notes that a gap that is tight on one side and loose on the other points to a bent shaft or worn bearing, which new shims or a new liner won't fix. Ask a pro before you shim.
SBT also says a liner with a glazed, polished or discolored band where the blade tips run has been slipping and heating, and is a sign it's near the end of its life even if the gap still measures close to spec.
Bend back the tabs of the nut retainer or pull the cotter pin, then remove the nut. Slide the shims and the impeller off the driveshaft, noting the key that locks the impeller to the shaft. Lay every part out in the exact order it came off, and count the shims above and below the impeller. A photo helps.
On most pumps you move one shim at a time from the stack on top of the impeller to the stack behind it. That pushes the impeller deeper into the tapered liner. Your manual confirms the direction for your pump. Then:
- Reinstall the impeller and key, the remaining shims, and the nut.
- Remeasure the gap.
- Repeat, one shim at a time, until the gap is within range.
Don't go tighter than the manual's minimum. A blade that rubs the liner will scrape both parts and can lock up the pump.
If every shim is already behind the impeller and the gap is still too large, the impeller, liner or both are worn out and need replacing.
We could not find a jet maker's sharpening procedure published on the web; where one exists, it is in the jet section of the service manual for that pump. So the rule is simple: if your service manual describes sharpening, follow it exactly; if it doesn't, have a jet dealer do it. Don't copy a method from a forum or from another brand's pump, because the blade shape and the edge profile differ from pump to pump. If your manual does cover it, the points to watch are:
- File only the side and angle the manual shows, and don't change the blade's working face.
- Aim for the edge the manual describes. It is not always a razor edge.
- Keep the blades even so the impeller stays balanced.
- Stop if a blade is chipped, cracked or bent. That impeller is a replacement.
A filed impeller has less metal on it, so it can run out of shim adjustment sooner. Check the gap again after any sharpening (steps 6 and 8).
Torque the impeller nut to your manual's spec. Fit the nut retainer and bend its tabs, or fit a new cotter pin, as the manual describes. A loose impeller can rattle at idle and damage the shaft. Many owners keep a spare nut retainer aboard, because a broken one costs far more than the part.
Turn the impeller by hand through several full turns. It should spin freely with no scraping or tight spots. Recheck the gap on every blade one last time.
Refit the intake housing and grate with anti-seize on the bolts if your manual calls for it, and torque them to spec. Grease the pump bearing (see the jet outboard care guide). Reconnect the battery and plug wires, and put the lanyard back. In a safe spot, run the boat with your normal load and compare rpm, hole shot and top speed with your baseline.
An impeller can settle slightly once the pump is loaded. After the first outing, make the motor safe again and recheck the gap. Then log the date, the shim count above and below, and your new rpm and speed in BoatMend.
Common mistakes
- Working on the impeller with the key in, the lanyard on or the battery connected
- Using a clearance figure from another brand or a forum instead of your own service manual
- Adding extra shims instead of moving them, or losing count of the stack
- Setting the gap too tight, so the blades rub the liner
- Filing a blade's working face, or filing blades unevenly so the impeller is out of balance
- Reusing a one-use nut retainer or cotter pin
- Shimming a pump whose real problem is a clogged grate, a gate not locked in forward or hull damage ahead of the intake
When to call a pro
- Chipped, cracked or bent blades, or deep gouges in the liner
- Liner worn more on one side than the other (the intake may need centering)
- All shims already moved and the gap still too big
- A rattle, grinding or vibration that stays after the job
- Grease coming out milky or watery, which points to seals (see the jet outboard care guide)
- You don't have the service manual or the right feeler gauges
Tips
- Check the gap at the start of each season and after any trip with lots of gravel running.
- Keep a spare nut retainer, a few shims and the grate bolts in your boat kit.
- Log your wide-open rpm and speed every few trips; a slow climb in rpm with less speed is your early warning.
- Get on plane in deeper water and come off plane where it is deep enough. Idling over gravel is what dulls impellers fastest.
Official references
We read these to write this guide. Your engine's own manual always wins.
- Outlaw Eagle – Jet Pump Maintenance (impeller, wear ring and clearance checks)
- Mercury Marine – Jet Outboards (25-105hp, stainless impellers)
- Mercury Marine – Jet 65-80hp (stainless impeller and abrasive debris)
- Bass Pro Shops 1Source – Shallow-Draft Boats & Jet Units (how the pump works)
- Boating Magazine – Honda Jet Outboards (2018)
- SBT – Cavitating and Won't Accelerate? Pulling the Pump and Fixing the Wear Ring and Impeller (2026)
Safety: BoatMend is for information only and does not replace a certified marine technician. You are responsible for your safety and your boat. Read the full disclaimer.
Last updated 2026-11-06
Related guides

Jet Outboard Care: Grease, Intake Grate, Impeller Clearance and Shallow-River Habits
A jet outboard trades the propeller and gearcase for a pump, so it needs different care. Learn how mounting height works, why the pump bearing needs frequent grease, how gravel and a worn impeller steal thrust, how to clear the intake safely, and when an adjustment is a shop job.

Converting an Outboard from Prop to Jet: Hull Fit, Mounting Height, Power Loss and Cost
Swapping your outboard's gearcase for a jet pump lets you run rocky, ankle-deep rivers, but it costs power and only works on the right hull. Learn which boats suit a jet, why the motor has to go higher on the transom, how much thrust you give up, and when buying a factory jet outboard makes more sense than converting.
Jet Boat Care - Flushing, Clearing the Pump, Oil, Steering Nozzle and Storage
A practical care routine for twin-engine sport jet boats like Yamaha models: pre-ride and post-ride checks, flushing both engines the safe way, clearing debris from the pumps, spotting a worn wear ring, keeping the nozzle and reverse bucket working, and getting the boat ready for storage.

Jet Ski and Jet Boat Pump Care: Clearing the Intake Grate and Checking the Impeller and Wear Ring
Clear weeds, rope and rocks from the intake grate of a Sea-Doo, Yamaha WaveRunner, Kawasaki Jet Ski or jet boat, and learn to spot a damaged impeller or worn wear ring. A clogged or worn pump is the usual reason a jet craft revs high but goes slow.

Loss of Power, Hesitation or Misfire - Troubleshooting Guide
Figure out why your engine bogs down, stumbles, will not reach full rpm or runs rough. Work from simple checks like trim, prop and fuel filter to ignition and engine protection modes before paying for diagnostics.
Prop Ventilation vs. Cavitation - Why Your Engine Revs Up and the Boat Loses Grip
Sudden RPM spikes, blowouts in turns, or a prop that slips when you accelerate are usually ventilation, not cavitation. Learn to tell them apart, then work through the fixes in order: trim, load, prop damage, the hull ahead of the prop, engine height, and finally a different prop.

Engine Cut-Off Switch (Kill Switch) and Lanyard: The Law, Testing and Daily Use
How the engine cut-off switch (ECOS) and its lanyard or wireless fob work, when federal law requires you to wear it (boats under 26 feet, 3 hp or more, on plane), how to test it before every trip, and why a spare clip aboard matters.
How to Grease Your Outboard's Lubrication Points
Grease the swivel bracket, tilt tube, steering and shift linkages, trim rams and prop shaft splines on your outboard. Grease keeps salt and water out of the moving joints. A 30-minute job once or twice a season prevents seized steering, stuck props and corroded brackets.

Boating on High-Altitude Lakes: Power Loss, Prop Changes, Cold Water and Mountain Weather
Engines lose roughly 3% of their power for every 1,000 feet of elevation, so a boat that flew at sea level can struggle on a mountain lake. Learn what's normal, when a lower-pitch prop or a dealer adjustment helps, and how to handle the strong sun, cold water and fast-changing weather up high.