How to Tell if Your Boat's Flotation Foam Is Waterlogged
Learn the signs that the foam under the floor or seats of a small boat has soaked up water, how to check without tearing the boat apart, what the Coast Guard flotation rules mean for you, and why replacing foam is usually a big job for a pro.

Time
1 h 30 min
Applies to
All engines · Fishing boat, Bowrider / runabout, Pontoon
Safety first: Flotation foam is what keeps a swamped small boat from sinking. Never remove foam and go boating without replacing it. If your boat sits noticeably lower than it used to, lists to one side, or takes on water faster than the bilge pump clears it, keep it out of the water until it is checked, and if you are already out and taking on water, put on life jackets and call USCG on VHF 16 or 911. Do not cut into floors near fuel tanks or fuel lines: gasoline vapor in a closed bilge plus a power saw is a fire risk. Two-part pour foam gives off harmful vapors while it cures, which is one more reason foam replacement belongs in a shop.
Owners often ask
- I think the flotation foam under my floor is waterlogged. How can I tell?
- Can I dry out wet flotation foam, or does it have to be replaced?
This guide walks you through it. Still stuck? Ask the AI Mechanic about your engine.
Tools
- Flashlight
- Camera or phone for photos
- Tape measure
- Small plastic or rubber mallet (or a screwdriver handle) for tap testing
- Moisture meter made for fiberglass (optional; borrow or rent one)
- Access to a certified truck scale, such as a truck stop scale (optional)
Parts & supplies
- Nothing for the inspection itself
- Marine-rated flotation foam, only as part of a professional repair
Before you start
What the foam does: Most small monohull boats have closed-cell foam under the floor, inside the seats or in hollow spaces along the sides. If the boat swamps or capsizes, the foam keeps it afloat. Over years, water can get into the foam through cracks, open cells, leaky rivets and fittings, or because the boat was stored with the plug in and rain filled the hull. Wet foam is heavy and holds water against the hull.
What the Coast Guard rules say (simplified):
- Monohull outboard boats under 20 feet must be built to pass the Coast Guard's flotation tests. These include a "level flotation" test: swamped and loaded as the rules describe, the boat must float roughly level in calm water (33 CFR 183, Subparts G and H).
- Monohull inboard and sterndrive boats under 20 feet must have enough flotation to keep part of the boat above the surface when swamped (Subpart F).
- These rules do not cover sailboats, canoes, kayaks, inflatable boats or racing boats, and they apply to monohulls only, so most pontoon boats are not covered. Boats 20 feet and over are not covered either.
- Builders certify compliance when the boat is built. Nobody re-tests it later, so if the foam is waterlogged or was removed by a previous owner, your boat may no longer float the way it was designed to.
- The rules also require flotation material that sits in the bilge to hold up to gasoline, oil and bilge cleaner. Ordinary insulation foam from a hardware store is generally not made to that standard.
Pontoons: Most modern pontoon tubes are sealed air chambers, and a heavy, low-riding tube is usually a leak (see the pontoon tube guide). Some older pontoons have foam-filled tubes or foam under the deck; the signs below still apply.
Your plan: Inspect, document and, if the signs add up, get an expert opinion before you spend money. This is an inspection guide, not a foam-replacement guide.
Steps
Look at the boat on the water, empty and with the usual gear. Signs of heavy, wet foam:
- The waterline or bottom paint line is under water when it used to show.
- The boat lists to one side or sits stern-down more than before.
- Water reaches the scuppers or splash well more easily. Photos from previous seasons, or the same model at the dock, help you compare.
Waterlogged foam can add hundreds of pounds; water weighs a little over 8 pounds per gallon. Owners notice the boat is slower, harder to get on plane, uses more fuel or will not reach its old top speed with the same engine and prop. These signs have other causes too (see the loss-of-power guide), so treat them as clues, not proof.
Take the boat on its trailer across a certified truck scale, then weigh the trailer alone (or use the trailer's published weight). Compare the boat's weight with the builder's dry weight plus engine, battery, fuel and gear. A big difference you cannot explain points to water in the hull or foam. Ask the builder or a dealer for the original weight if it is not on a spec sheet.
With the boat on the trailer and the bow raised, pull the drain plug and see how much comes out. Water that keeps trickling out for hours or days after a rain, or comes out of rivet heads, screw holes or seams, suggests water trapped under the floor or in the foam. Note whether it smells of fuel; if it does, stop and see the fuel tank guide or a pro.
Walk the floor and press on the seats. Soft spots, a floor that flexes, screws that spin, or a squishing sound are warning signs. On fiberglass boats, tap the floor and sides with a small mallet and listen for dull, dead areas compared with crisp, solid ones.
Open inspection ports, seat hatches, the bilge and any storage under the floor. Look for foam that is dark, crumbly, swollen, or wet when pressed through a gap. Do not cut new holes just to look; every new hole is a new leak path.
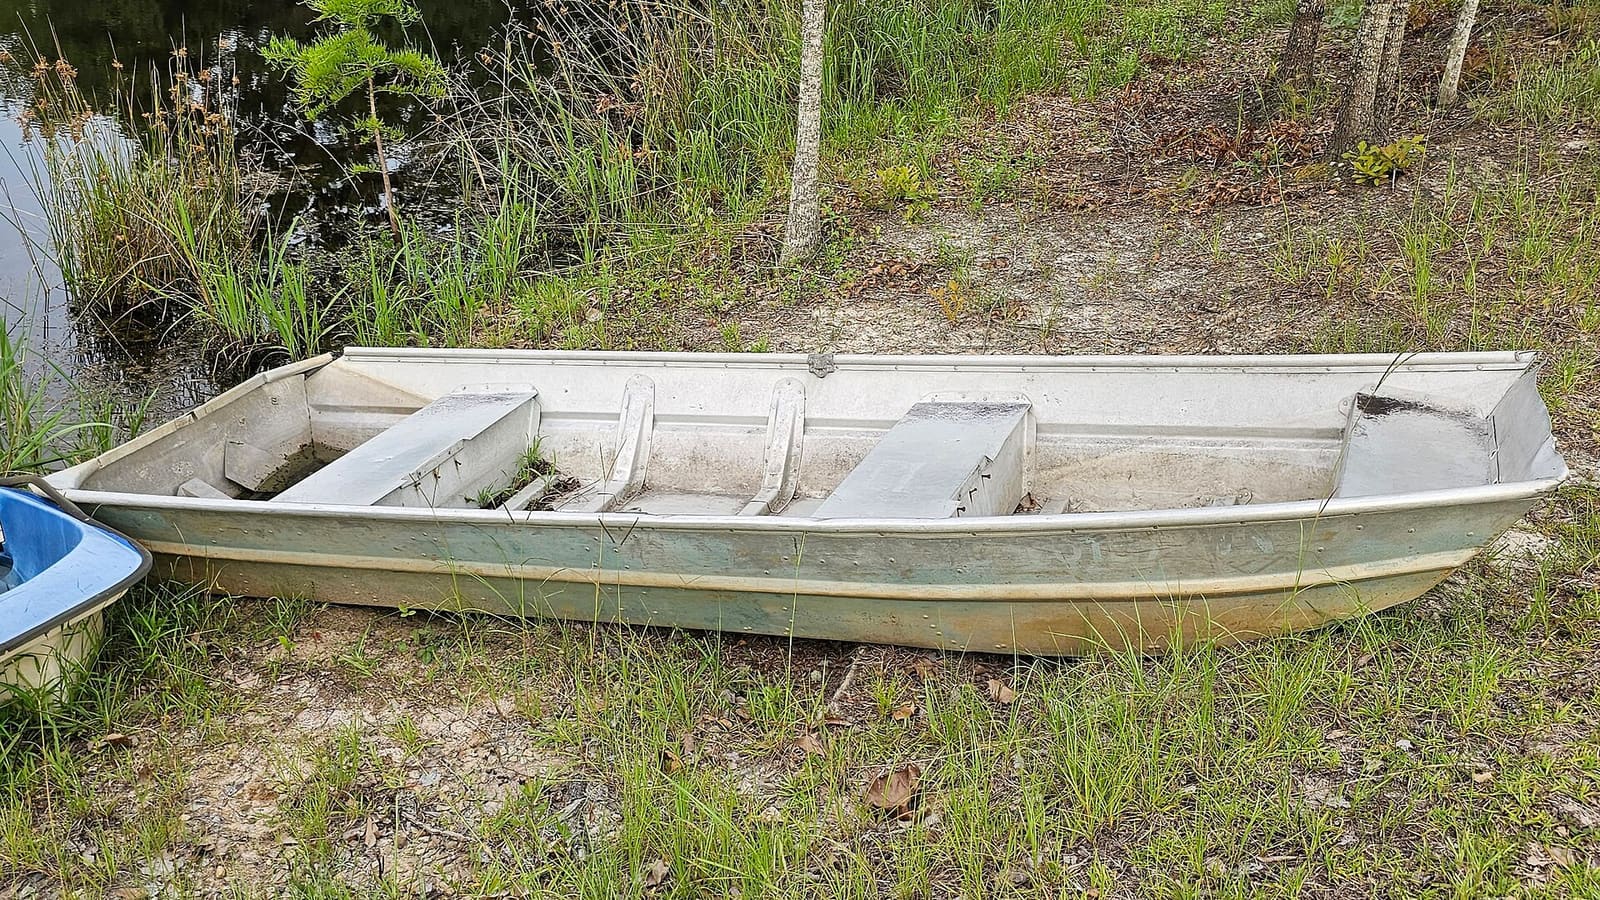
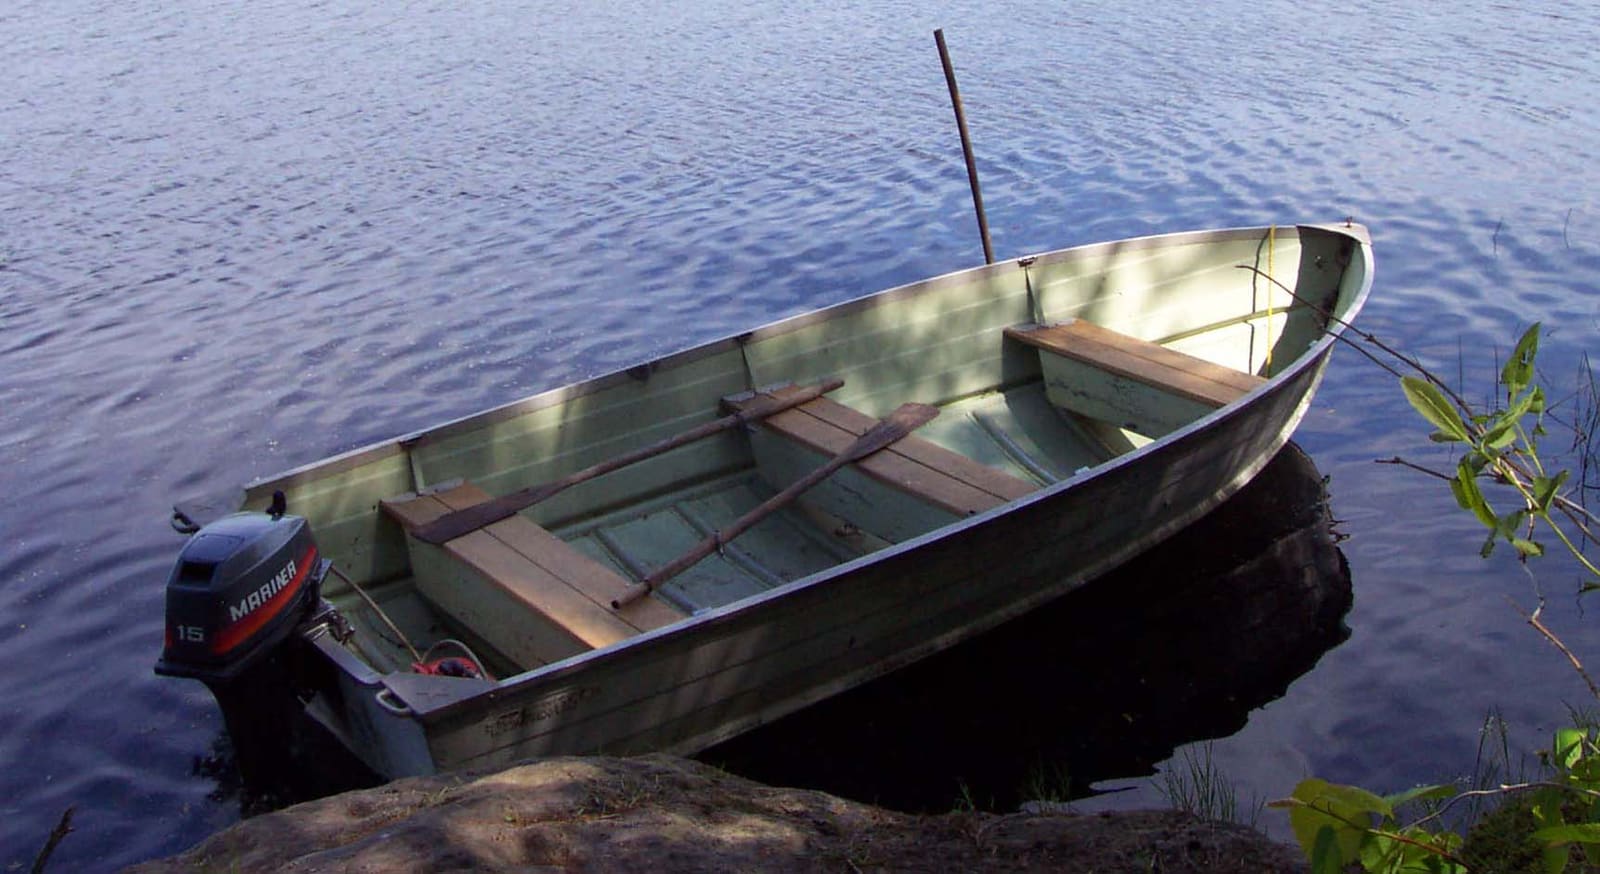
On many small aluminum boats the flotation foam is sealed inside the bench seats or under the floor. Photo: JJonahJackalope / Wikimedia Commons · CC BY-SA 4.0 A meter made for fiberglass can show wet areas in the floor and liner of a fiberglass boat. Readings are relative: compare suspect spots with areas you know are dry, such as the topsides above the waterline. Moisture meters do not read through aluminum, so on aluminum boats rely on the other signs. A marine surveyor has better tools and experience reading them.
Wet foam pressed against an aluminum hull keeps the metal damp, and that can lead to pitting and corrosion along the bottom, ribs and rivets, especially if salt water got in. Look for white powder, pitting or weeping rivets in the bilge and along the outside of the bottom (see the aluminum guides).
A boat that is getting heavier may simply be leaking: a missing drain plug, a cracked fitting, a loose rivet or a bad livewell or bilge hose. Fix and find those first (see the boat-taking-on-water and aluminum rivet guides). Foam can only stay wet if water keeps getting in or cannot drain out.
Foam trapped under a sealed floor has almost no way to dry. Leaving the boat in the sun with the plug out helps the bilge, not the foam. Some owners drill drain holes or leave the boat tilted for months with little change. Waterlogged foam usually has to be cut out and replaced.
Replacing foam generally means:
- Removing seats, consoles and often the whole floor or deck (on aluminum boats, drilling out rivets; on fiberglass boats, cutting the deck).
- Digging out the wet foam and drying and inspecting the hull, stringers and transom underneath.
- Fixing the cause of the water (leaks, drainage).
- Installing new marine-rated foam, either cut blocks or two-part pour foam, in the right amount and places so the boat floats level again.
- Rebuilding the floor and reinstalling everything. Shops often find rotten stringers or transom wood while they are in there (see the transom and stringer guide). Get a written estimate; on older small boats the cost can approach the value of the boat.
Write down what you found, with photos, and note it in BoatMend. Options are: get a surveyor or shop to confirm, budget for a restoration, or, if the boat is worth less than the repair, use it cautiously in calm water near shore with everyone in life jackets until you decide. If you are buying a used boat, a heavy, wet hull is a strong reason to walk away or to negotiate hard.
Common mistakes
- Pulling out wet foam and not replacing it. The boat may sink if it swamps.
- Filling with hardware-store foam board or spray cans. Many are not made to resist gasoline and oil, and some soak up water. The Coast Guard's flotation handbook for builders notes that ordinary foamed polystyrene ("Styrofoam" and bead board) dissolves in gasoline and burns easily, must not touch uncured polyester resin, and that very low-density polyurethane pour foam can absorb a lot of water. Use foam made and rated for marine flotation, chosen by someone who knows how much the boat needs.
- Pouring foam into a boat with no drainage path. Water then collects under or around the new foam and the problem starts over.
- Storing the boat with the drain plug in and no cover. Rain fills the hull and soaks the foam. Store it covered, bow up, plug out (and put the plug back before launch).
- Cutting new holes just to look. Use existing hatches and ports; every new hole is a new leak.
- Blaming the engine. A boat that suddenly will not plane may simply be much heavier than it used to be.
When to call a pro
- The boat sits clearly lower, lists, or is hundreds of pounds over its expected weight
- The floor is soft or the stringers or transom may be rotten
- Water or fuel smell comes from under the floor
- You find corrosion, pitting or weeping rivets on an aluminum hull
- You want foam replaced or added (amount and placement matter for safety)
- Before buying a used boat with any of the signs above, hire a marine surveyor
Tips
- After every rain or wash, pull the plug with the bow raised so water drains out of the hull.
- A good cover that sheds water keeps rain out of the foam in the first place.
- Keep a photo of your boat floating at the dock each spring so you can spot changes over the years.
- On the capacity plate, check the maximum persons and weight; a waterlogged boat already uses up some of that margin.
- Buying a boat that sat outside uncovered? Most sellers will not let you drill test holes. Weigh it, look for cracked or discolored stringers and bulkheads, and ask about freeze-thaw winters: water that gets between foam and its covering and then freezes breaks the foam down. A surveyor with a moisture meter or an infrared camera can spot wet areas; on a cool morning, sections of hull that stay colder as the sun warms the boat can point to trapped water.
Official references
We read these to write this guide. Your engine's own manual always wins.
- eCFR – 33 CFR Part 183 Subpart F, Flotation Requirements for Inboard Boats, Inboard/Outdrive Boats, and Airboats
- eCFR – 33 CFR Part 183 Subpart G, Flotation Requirements for Outboard Boats Rated for Engines of More Than 2 Horsepower
- eCFR – 33 CFR Part 183 Subpart H, Flotation Requirements for Outboard Boats Rated for Engines of 2 Horsepower or Less
- U.S. Coast Guard – Boatbuilder's Handbook, Flotation Requirements (Subparts F, G and H, flotation materials)
Safety: BoatMend is for information only and does not replace a certified marine technician. You are responsible for your safety and your boat. Read the full disclaimer.
Last updated 2026-10-24
Related guides
How to Inspect a Used Boat Before You Buy
A step-by-step checklist for looking over a used boat, from paperwork and the hull ID number to the transom, engine, compression test, sea trial and trailer. Know what to check yourself, what the red flags mean, and when to pay a marine surveyor.
How to Check a Boat for Transom and Stringer Rot
Many older fiberglass boats have wood inside the transom, stringers and deck, and water that gets in slowly rots it. Learn the tap test, the flex test, how to read a moisture meter and the other warning signs, and why a rotten transom or stringer is a structural job for a pro, not a weekend patch.
How to Find and Fix Leaking Rivets on an Aluminum Boat
Almost every older riveted aluminum boat weeps a little water. Learn how to find the leaking rivets, tighten the ones that are loose, seal the rest with a flexible epoxy, replace the bad ones the right way, and know when a crack or corrosion needs a welder.
How to Spot and Prevent Corrosion on an Aluminum Boat
Aluminum hulls and pontoon tubes are tough, but they lose almost every fight with other metals. Learn the warning signs of galvanic and stray current corrosion, keep copper and loose metal away from the hull, choose the right anodes, touch up paint with the proper primer and know when a repair needs a welder.
How to Test and Clean Your Bilge Pump and Float Switch
Make sure your bilge pump actually moves water overboard, both on the manual switch and automatically through the float switch. A working bilge pump is one of the most important safety systems on any boat that stays in the water.
How to Find a Leak When Water Gets Into a Pontoon Tube
A pontoon that sits low on one side, lists or sloshes when you rock it probably has water in a tube. Learn how to confirm it, drain it, track down the pinhole or cracked weld, and choose between a temporary patch and a proper weld repair.
What to Do When Your Boat Is Taking On Water: Emergency Steps and Prevention
A step-by-step emergency plan for water coming into the boat - life jackets on, call for help early on VHF 16, find and slow the leak, pump, and head for shallow water if needed - plus the maintenance checklist that prevents most sinkings.

Loss of Power, Hesitation or Misfire - Troubleshooting Guide
Figure out why your engine bogs down, stumbles, will not reach full rpm or runs rough. Work from simple checks like trim, prop and fuel filter to ignition and engine protection modes before paying for diagnostics.
How to Inspect Your Boat's Fuel Tank, Fill, Vent and Hoses
A leaking gas tank is one of the most dangerous problems a boat can have, and it usually starts out of sight. Learn how to inspect portable and built-in tanks, spot aluminum tanks corroding from below, know the ethanol risk for old fiberglass tanks, and check the fill, vent, hoses, clamps and sender, plus why tank replacement is a job for a pro.